Heat & Fire
Charring Chilies
Blistering chilies over flame to loosen their skins and add smoky flavor.
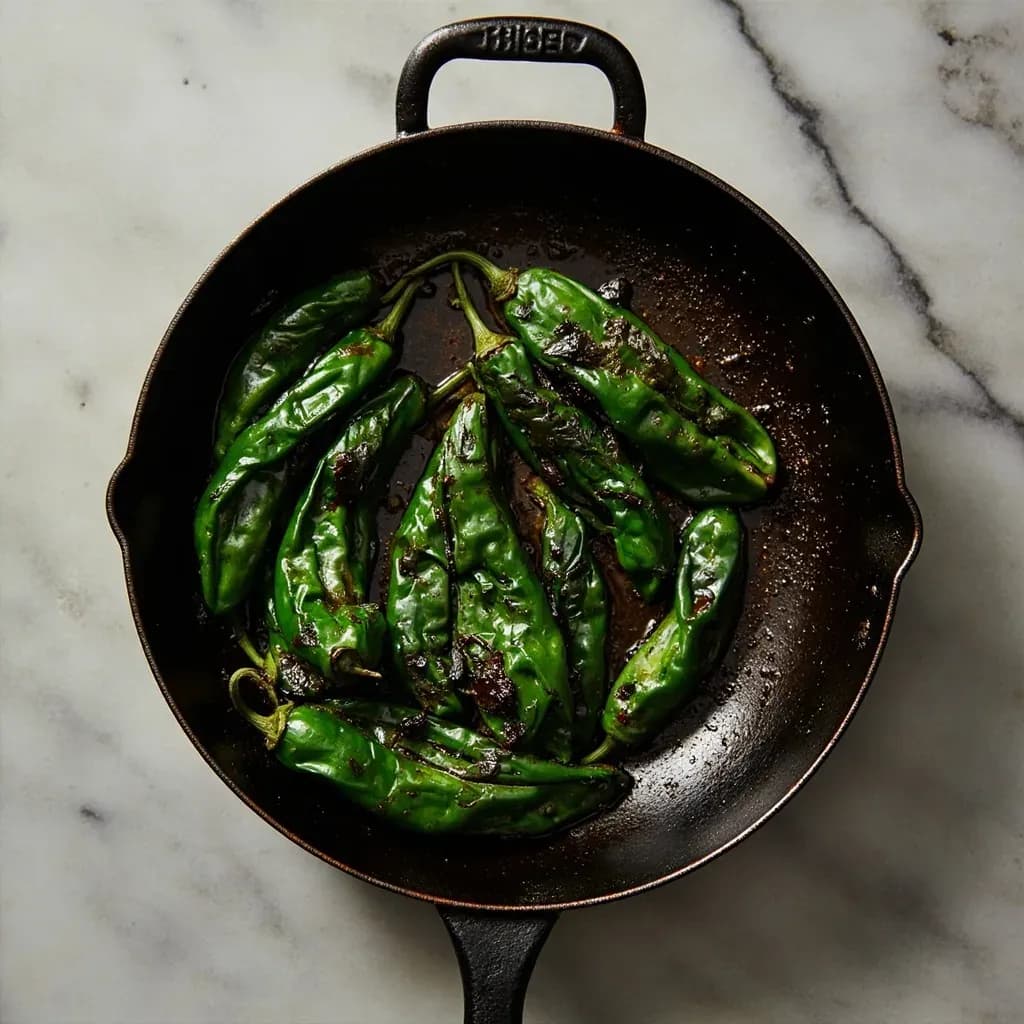
Charring chilies holds them over open flame, a comal, or a broiler until the skins blister and blacken. This loosens the tough outer skin for peeling and develops a smoky, roasted depth used in salsas and sauces. After charring, cooks often steam the chilies in a covered bowl or bag so the skins slip off easily.
Charring chilies is a foundational Mesoamerican technique that applies intense direct, dry heat to peppers until their skins blister and blacken, then uses trapped steam to lift that skin away. For fresh chilies — most often poblanos, jalapeños, serranos, and Anaheims — the goal is to blacken the cuticle without cooking through the flesh, then peel the pod to reveal sweet, smoky, tender meat underneath. For dried chilies — anchos, guajillos, pasillas, and chiles de árbol — the same dry-heat contact is applied in seconds rather than minutes, just enough to wake up the dormant oils and make the leathery pods pliable for soaking.
The technique matters because it produces flavors that raw chilies simply do not have. Surface sugars caramelize, grassy or bitter notes burn off, and a layer of true smokiness settles into the flesh — all without a smoker or any specialized equipment. A comal and an open flame have done this work for thousands of years; the same physics holds in a modern kitchen with a gas burner, broiler, or cast-iron skillet.
The single most common mistake is treating fresh and dried chilies as if they were the same job. They are not. A poblano should look like a lump of coal before it is steamed; a guajillo should never scorch. Knowing which camp you are cooking in — blister-and-peel versus quick toast — is the entire craft.
- Difficulty
- Easy
Types & varieties
Thick-fleshed; benefits most from full charring and peeling. Base for chiles rellenos, rajas, and crema de poblano.
Medium-thick walls. Charred for salsa, nachos, tacos, and as the first step in chiles en escabeche.
Thin walls and high heat; char quickly over open flame for bright, smoky green salsas.
Long, mild pods char well in quantity; classic for New Mexico–style stews and rajas.
Red, fruity, medium-heat; charred whole for table salsa and taco garnish.
Blistered whole over very high heat as a bar snack; skin typically left on.
Lightly toasted on a comal to revive oils before soaking; backbone of many moles and adobos.
Toast briefly to soften without scorching; foundation of salsa roja and guajillo adobo.
Toasted gently; key in mole and pipián sauces.
Quick toast only; brittle, burn easily, deliver sharp smoky heat to salsas and oils.
Toast lightly to wake up flavor for red chile sauces of the Southwest.
How to do it
- 1
Choose and prep the chilies
Select firm, unblemished fresh chilies with taut, glossy skin — wrinkled or soft pods char unevenly and collapse. Rinse fresh chilies and pat them completely dry; surface moisture causes sputtering and uneven blistering. Leave the stems on for easier handling. For dried chilies, wipe with a barely damp cloth and remove the stems and seeds only after toasting.
- 2
Heat the flame or pan
Set a gas burner to high, build a wood or charcoal fire, or preheat a comal or dry cast-iron skillet. Use medium-high heat for fresh chilies, medium for dried. For a broiler, position the rack 10–15 cm (4–6 in) from the element and preheat on high; line a sheet pan with foil for easy cleanup. Optional: flick a few drops of water onto a hot comal before adding fresh chilies to encourage the popping and smoky aroma of tatemado cooking.
- 3
Char the fresh chilies
Lay fresh chilies directly on a burner grate, grill, or comal, or hold them with long tongs over the gas flame. Turn every 20–40 seconds as the skin blackens and blisters. Aim for even char on every side; poblanos should be completely blackened, while thinner chilies like serranos and Fresnos only need a quick blister — 30–60 seconds per side. Under a broiler, arrange on the sheet pan and broil 4–8 minutes, flipping once. For dried chilies, press each pod flat on a warm comal for 5–15 seconds per side until fragrant and just pliable — never let them blacken or smoke heavily.
- 4
Steam to loosen the skins
Transfer charred fresh chilies to a bowl and cover tightly with plastic wrap, a plate, a lid, or a clean kitchen towel. Alternatively, seal them in a paper or plastic bag. Rest 10–15 minutes; the trapped steam separates the charred cuticle from the flesh. Skipping this step makes peeling nearly impossible and is the most common home-cook mistake. Pour any liquid that pools in the bowl into your sauce — it carries significant smoky flavor.
- 5
Peel, stem, and seed
Once cool enough to handle, rub the chilies between your fingers or with a paper towel; the blackened skin should slip off in leathery patches. Use a paring knife for stubborn spots, but take only skin — the flesh underneath should be tender and bright, not raw-looking. Slice off the stem. For rellenos, leave whole; for salsas and sauces, slit lengthwise and scrape out seeds and pale ribs if a milder result is wanted.
- 6
Use or store
Use immediately in salsa, rajas, sauces, or as a stuffing vessel. Refrigerate peeled chilies in a sealed container with a spoonful of their steaming liquid for 3–5 days, or simmer briefly and pack under olive oil, then refrigerate, for up to 2 weeks. To freeze, lay peeled chilies flat on a sheet pan until solid, then bag and store up to 6 months.
Two techniques that share one name
"Charring chilies" actually describes two related but distinct procedures that are often conflated. The first is blistering fresh chilies for peeling — poblanos destined for chiles rellenos, jalapeños for salsa tatemada, Anaheims for rajas. Here the heat is aggressive and the goal is to char the skin completely, then trap the chilies so steam separates cuticle from flesh. The second is toasting dried chilies to revive them before soaking — anchos, guajillos, pasillas, chiles de árbol. Here the heat is gentle and brief; the goal is to warm the brittle pod until its volatile oils bloom and it becomes pliable, without ever letting it blacken or smoke heavily. Confusing the two — particularly charring dried chilies like a fresh poblano — produces bitter, acrid sauces.
- Fresh chilies: aim for full blackening, then steam 10–15 minutes before peeling.
- Dried chilies: 5–15 seconds per side on a medium comal; stay brick-red, never coal-black.
- Heat intensity, not technique, is the dividing line: blister aggressively, toast gently.
Choosing your heat source
Each heat source leaves a slightly different signature. A gas burner delivers concentrated, fast charring and the cleanest smoke flavor. A wood or charcoal fire adds ambient smoke but requires turning more often to avoid hot spots. A comal or dry cast-iron skillet gives the cook more control over pace and is the traditional Mexican choice for both fresh blistering and dried toasting. A broiler set to high with the rack 10–15 cm (4–6 in) from the element is the most reliable indoor method for fresh chilies in quantity.
- Gas flame: fastest blister, hands-free if you set a grate over the burner.
- Comal / cast-iron: best control; classic for dried chilies.
- Charcoal or wood fire: deepest smoke; rotate constantly over hot spots.
- Broiler: even heat for larger batches; foil-lined sheet pan for easy cleanup.
Common uses
Tips & pitfalls
- Never rinse charred chilies under cold water to cool them — it washes away smoky flavor and contracts the flesh before the skin releases. Steam them in a covered bowl instead.
- For poblanos destined for chiles rellenos, char until the skin is entirely black and crackled; under-charring makes peeling a chore and leaves bitter flecks on the flesh.
- For thin-walled chilies (serrano, shishito, Fresno), work fast — 30–60 seconds per side is plenty, and over-charring turns them bitter.
- When toasting dried chilies, use a dry comal or skillet over medium heat, pressing flat for 5–15 seconds per side; any longer blackens the skin and turns the flesh acrid.
- Char in small batches so chilies do not steam in their own moisture; crowding prevents blistering and gives you soggy, grayish pods.
- De-seed after charring and peeling to tame heat; leave seeds and ribs intact for maximum punch in salsas and adobos.
- Use long-handled tongs or set a metal grate over the burner so you can roll chilies hands-free without scorching yourself.
- A broiler set to high with chilies on a foil-lined sheet pan is the most reliable indoor method; flip halfway through, 4–8 minutes total.
Good to know
- Origin
- Mesoamerica; drying and toasting chilies over open flame predates European contact by several thousand years
- Active time
- 3–8 minutes per batch of fresh chilies over direct flame; 4–8 minutes under a hot broiler
- Steam rest
- 10–15 minutes in a tightly covered bowl or sealed bag after charring fresh chilies
- Fresh chilies commonly charred
- Poblano, jalapeño, serrano, Anaheim/Hatch, Fresno, cubanelle, shishito, padrón, güero
- Dried chilies commonly toasted
- Ancho, guajillo, pasilla, mulato, chiles de árbol, cascabel, New Mexico
- Flavor effect
- Adds smoky depth, caramelizes surface sugars, mellows grassy or harsh notes, deepens color
- Yield
- Poblanos lose roughly 15–20% of their weight after charring and peeling
- Storage after peeling
- Refrigerate in sealed container 3–5 days, refrigerate in oil up to 2 weeks, or freeze up to 6 months
Also called
chili-charring · roasting chilies
Related

Sear
Blast the surface hot for a deep-browned, savory crust

Sauté
Cook quickly in a little fat over lively heat, tossing as you go

Stir-Fry
Toss bite-sized pieces over roaring heat for fast, smoky cooking

Pan-Fry
Crisp food in a shallow layer of hot fat, turning once or twice

Deep-Fry
Submerge in hot oil for an all-over crackling crust

Roast
Cook uncovered in dry oven heat for browned edges and tender centers

Bake
Cook with steady, surrounding oven heat — the soul of bread and pastry

Broil
Hit food from directly above with fierce overhead heat