Water & Steam
Chili Simmering
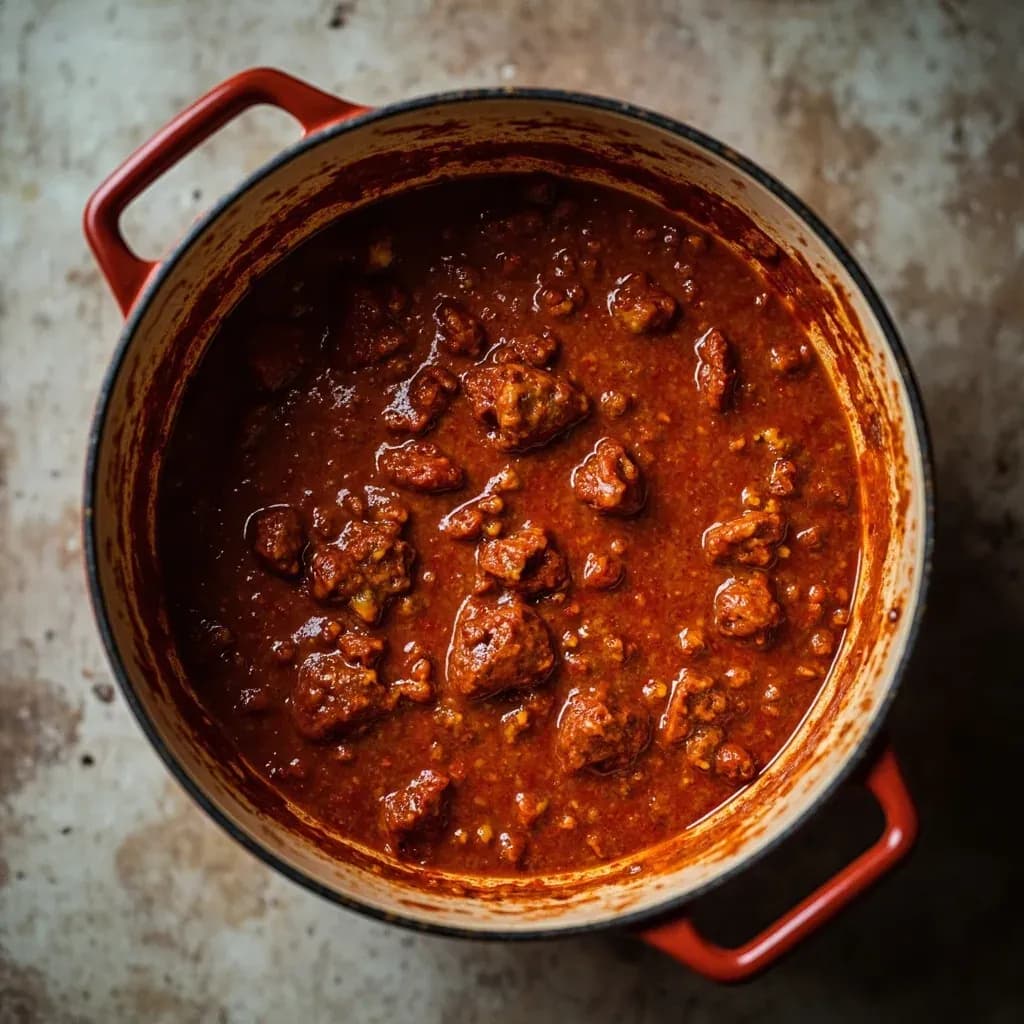
Slow-simmering chilies into a thick, melded chili stew or sauce.
Chili simmering gently cooks chilies, meat, beans, and aromatics in liquid over low heat for an extended time so flavors marry and the sauce thickens. The long, slow heat tenderizes proteins and tames raw chili heat into rounded warmth. Stirring and skimming keep it from scorching as it reduces to a rich consistency.
Chili simmering is the slow, gently bubbling reduction that turns seared meat, dried chiles, aromatics, and stock into one thick, unified pot of stew. The defining feature is temperature: the liquid holds at roughly 180–205 °F (82–96 °C), so bubbles break the surface lazily — one every second or two — instead of churning in a rolling boil. That low, steady heat is what allows collagen to dissolve into gelatin, dried-chile paste to integrate with rendered fat, and ground spices to round out their harsh edges without scorching. Over one to several hours, the liquid reduces, the sauce darkens and tightens, and the pot's contents move from a collection of ingredients to a single, glossy dish.
The technique borrows from braising, stewing, and reduction, but is none of them exactly. The pot stays open like a reduction rather than sealed like a braise, never boils (which would toughen protein and split beans), and finishes as one dish where sauce and meat are inseparable. A proper chili simmer is active work: the cook skims, stirs, tastes, and adjusts the lid position as the liquid drops. The reward is a pot that smells whole rather than layered, and a spoonful that tastes of one thing rather than many.
Most home failures with chili are failures of temperature. A pot held at a hard boil drives off volatile aromatics before they can settle into the sauce, snaps the skins of beans, and tightens the proteins in meat into something stringy. Chili simmering rewards patience and restraint: the pot should look almost still, and the cook's main job is to keep it that way for as long as the recipe needs.
- Difficulty
- Easy
Types & varieties
Chunky beef, dried whole chiles, no beans; long, uncovered simmer to reduce to a dark, brick-red stew.
Pork shoulder simmered with tomatillos, green chiles (Hatch, jalapeño, serrano), and cilantro — typically covered until the final reduction.
Thinner, finely ground beef simmered with warm spices (cinnamon, allspice, clove) and unsweetened chocolate; cooked uncovered to a loose, sauce-like consistency.
Beans partially mashed against the pot wall during the simmer to thicken the liquid naturally, with no rendered fat to skim.
Poached chicken simmered with white beans, green chiles, and a dairy or cream finish stirred in only at the very end.
Homestyle or 'cook-off' chili simmered 6+ hours with a fine 'chili grind' meat, no beans, and a glossy, sauce-like consistency.
Pork cubes simmered (often covered) in a pure red-chile sauce until nearly falling apart.
How to do it
- 1
Brown the meat
Pat the beef (or pork) dry, season lightly, and sear in batches in a heavy pot over medium-high heat in a thin film of fat or oil. Brown deeply — fond on the pot bottom is flavor. Transfer meat out and pour off all but 2–3 tablespoons of fat.
- 2
Bloom the spices
Lower heat to medium. Add dried oregano, cumin, coriander, and any ground chiles to the hot fat and stir 30–60 seconds until fragrant. If using whole dried chiles, toast, rehydrate, and blend them separately into a smooth, strained paste.
- 3
Sweat the aromatics
Add diced onion to the pot and cook 4–6 minutes until translucent and just beginning to color at the edges. Add garlic and any fresh or frozen chile in the last minute so it doesn't scorch.
- 4
Deglaze and combine
Pour in a small amount of stock, beer, or water and scrape the bottom of the pot with a wooden spoon to dissolve the fond. Return the meat, add the chile paste, tomatoes, beans (if using), and enough liquid to barely cover the meat.
- 5
Bring up to a boil, then drop to a bare simmer
Increase heat to high until you see a full boil, then immediately reduce to the lowest setting. You want lazy bubbles — one every second or two — at 180–205 °F. Adjust with a flame diffuser or by moving the pot partially off the burner if needed.
- 6
Skim, stir, and watch the lid
Skim rendered fat with a flat spoon every 30–45 minutes. Stir gently every 10–15 minutes, scraping the bottom. Leave the lid off for reduction; offset the lid for a saucier chili; cover fully only if the pot is drying out faster than the meat is tenderizing.
- 7
Time the simmer to the meat and style
Chuck or pork shoulder needs at least 2 hours to become spoon-tender; a chili-grind beef chili is ready in 45–90 minutes. Cincinnati-style is done when loose and aromatic. Total simmer: usually 1.5–4 hours for homestyle, 6–8+ for competition.
- 8
Adjust and finish
Off heat, taste for salt (add only now), acid (a squeeze of lime or splash of vinegar brightens), and heat (a few drops of hot sauce). Stir in fresh herbs (cilantro, oregano) and any dairy — sour cream, crema, cheese — only at the very end so they don't break.
- 9
Rest before serving
Let the chili sit off heat, lid on, 20–60 minutes. The starches from beans and the collagen from the meat will set slightly, thickening the chili and rounding the flavors. Reheat gently to serve.
Troubleshooting a chili simmer
Most problems at the simmer stage come down to three things: temperature, lid, and liquid level. Use this as a quick check when the pot doesn't look or taste right.
- If the meat is tough and the sauce is thin: the pot has been boiling, not simmering. Drop the heat, leave the lid off, and give it another 60–90 minutes — collagen needs both time and gentle heat.
- If the bottom is starting to scorch: the heat is still too high for the liquid level. Drop the flame, stir the fond up off the bottom, and add only a small splash of stock or beer rather than water, which dilutes the seasoned liquid.
- If the chili tastes one-dimensional despite a long simmer: the spices were probably added to cold liquid instead of bloomed in fat. Bloom a fresh teaspoon of cumin and oregano in a little oil and stir it in for the last 30 minutes.
- If the dish is too salty at the end: dilute with a cup of unsalted stock, or stir in more unsalted beans, tomato, or meat. A squeeze of lime will brighten and distract from the salt; sugar masks flavor rather than fixes it.
- If the chili is greasy on the tongue: skim more aggressively, or chill the pot briefly so the fat rises and solidifies for easy lift-off.
- If the dried-chile flavor is flat or dusty: the paste probably wasn't strained. Pass it through a fine-mesh sieve before adding it to the pot — chile skins can leave a coarse, papery quality that muddies a long-simmered sauce.
Common uses
Tips & pitfalls
- Bring the pot to a boil first, then drop the flame — a true simmer, not a hard boil, keeps meat tender and prevents dairy and bean skins from breaking too aggressively.
- Stir every 10–15 minutes, scraping the bottom, so the fond lifts back into the liquid instead of burning.
- Bloom ground spices in the rendered fat for 30–60 seconds before adding liquid — this unlocks fat-soluble aromatics that water-based simmering cannot extract.
- Toast and rehydrate dried whole chiles separately, then strain them into a smooth paste; this is the single biggest flavor upgrade over chili powder alone.
- Add acid (lime juice, vinegar, hot sauce) only in the last 5–10 minutes — prolonged simmering flattens acidity.
- Resist the urge to add water mid-simmer if the pot looks dry; chili is meant to reduce. Add liquid only if the bottom is truly scorching.
- Taste and adjust salt at the end — a 4-hour simmer can concentrate saltiness by 20–30%.
- If the chili is too thin at the end, mash a cup of beans against the pot wall or simmer uncovered 10 more minutes; do not stir in flour or cornstarch.
Good to know
- Simmering temperature
- Approximately 180–205 °F (82–96 °C) — bubbles break the surface lazily, never a rolling boil.
- Minimum simmer time
- 30–60 minutes for a quick weeknight chili; 2–4 hours for proper flavor melding; competition-style chiles simmer 6–8+ hours.
- Pot type
- Heavy-bottomed Dutch oven or stockpot to distribute heat evenly and prevent scorching at low flame.
- Lid position
- Uncovered for reduction and a thicker stew; partially covered for a saucier chili; fully covered only for very lean chiles that need moisture retention.
- Fat management
- Skim rendered fat with a ladle or flat spoon every 30–45 minutes for cleaner flavor, or reserve it for cornbread.
- Heat source
- Stovetop on a diffuser, low oven (around 300 °F / 150 °C), or slow cooker on LOW; HIGH is too aggressive.
- Salt timing
- Salt is added late in the simmer, since liquid reduction concentrates seasoning by 20–30%.
- Resting
- Off-heat rest of 20–60 minutes (or overnight, refrigerated) lets starches gel and flavors marry.
- Origin of the technique
- Slow-simmering of chili traces to 19th-century San Antonio 'chili queens' and chuck-wagon cooking on the Texas trail.
Also called
chili stewing
Related

Boil
Cook in vigorously bubbling liquid at full rolling heat

Simmer
Hold liquid at a gentle shimmer for tender, unhurried cooking

Poach
Cook gently in barely-trembling liquid for silky, tender results

Steam
Cook in rising vapor to keep color, nutrients, and shape intact

Blanch
Plunge briefly in boiling water, then shock cold to lock color

Braise
Sear, then cook slow in a little liquid until fall-apart tender

Stew
Simmer bite-sized pieces fully submerged into a rich, unified pot

Sous-Vide
Seal and cook in precise warm water for edge-to-edge doneness