Transform & Preserve
Headspace Measuring
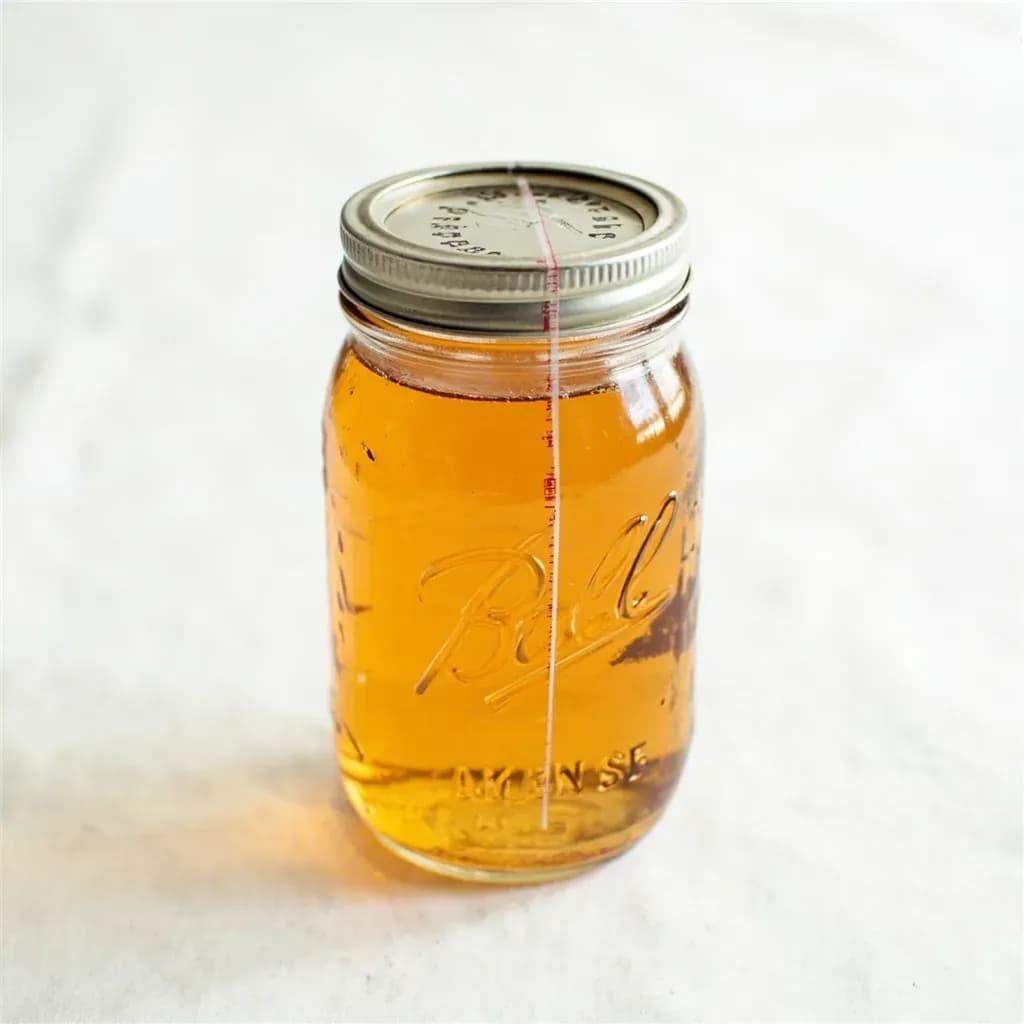
Leaving the correct empty gap in a jar so canned food seals and expands safely.
Headspace measuring sets the gap between food and the lid in a canning jar, typically a quarter inch for jams and up to an inch for low-acid foods. Correct headspace lets contents expand and air vent during processing so a strong vacuum seal forms on cooling. Too little risks seal failure or leakage; too much can leave air that spoils the contents.
Headspace is the empty gap left between the top of the food in a canning jar and the underside of the lid once it is seated. It looks like a small detail, but it does two very different jobs at once: it gives the food room to expand as it heats in the canner, and it sets the volume of air that will be drawn out as the jar cools to form the vacuum seal. Get it wrong in either direction and the jar either blows food into the sealing compound or finishes with too much trapped oxygen, and the lid will not hold.
The measurement itself is taken with a flat, graduated headspace tool (or a clean plastic ruler) laid across the mouth of the jar, after the food has been de-bubbled and settled but before the lid goes on. The four standard gaps codified by the USDA and the major preserving brands — 1/4, 1/2, 1, and 1-1/4 inches — are not interchangeable. Each corresponds to a class of food with a particular density, expansion rate, and acidity, and a tested recipe should always name the exact gap it expects. Pre-1989 family recipes often specified headspace gaps that no longer match current tested standards; cross-check any inherited recipe against a current USDA, Ball, or extension-service source before you trust it.
In practice, headspace is one of the four pillars of safe home canning — alongside acidity, processing time, and processing method. It is also the easiest pillar to get right once you have the right tool and the habit of measuring after de-bubbling rather than before.
- Difficulty
- Easy
Types & varieties
For jams, jellies, preserves, conserves, marmalades, fruit butters, honey, and syrups — foods that barely expand and seal under their own surface tension.
The most common gap: fruits packed in juice or water, whole or crushed tomatoes, salsas, pickles, relishes, chutneys, corn, and most vegetables in pints.
For low-acid vegetables, meats, poultry, and seafood in pint or half-pint jars, and for starchy foods that swell more during processing.
For low-acid vegetables, meats, poultry, and seafood in quart jars, where the larger volume expands more.
Tends to call for a larger gap than the hot-pack version of the same food, because raw ingredients shrink as they heat in the canner.
Tighter than raw pack, since the food has already lost volume during pre-cooking.
How to do it
- 1
Prepare recipe and jars
Wash Mason jars and lids in hot soapy water and keep jars hot in a simmering pot or warm oven. Read the recipe all the way through and note the exact headspace it calls for (1/4, 1/2, 1, or 1-1/4 inch) — do not guess or round.
- 2
Fill the jar
Set a wide-mouth canning funnel in the jar and ladle in hot food, or pack raw food in firmly but without crushing. Fill to roughly the target level, leaving a little extra because the food will settle once bubbles are released.
- 3
Release trapped air bubbles
Slide a non-metallic bubble remover or a plastic chopstick down the inside edge of the jar in four or five spots, gently pushing toward the center. For soft fruit, work lightly so you do not mash it; for raw vegetables, work thoroughly so liquid fills the voids.
- 4
Measure and adjust headspace
Lay a headspace tool flat across the jar opening — not at an angle — and read the gap. Add hot liquid or a spoonful of food to reach the recipe's exact measurement, or spoon out excess if you have overfilled. Re-measure after each adjustment.
- 5
Wipe the rim clean
Dampen a clean paper towel or cloth with vinegar or hot water and wipe the entire sealing surface of the rim until it shines. A single seed, smear of fat, or bead of syrup on the rim will prevent the lid compound from bonding to the glass.
- 6
Center the lid and apply the band
Place a new flat lid on the jar, centering the sealing compound over the rim. Screw the band down fingertip-tight — snug against the jar, but with no force. Air must be able to vent from the jar during processing or the lid can buckle.
- 7
Process and cool undisturbed
Lower jars onto the rack in a boiling-water canner or pressure canner and process for the full time stated in the recipe. Lift jars out, set them upright on a folded towel, and leave them untouched for 12 to 24 hours so the vacuum can form and the seals set.
- 8
Check seals, label, and store
After cooling, press the center of each lid; it should not flex or pop. Remove the bands, wipe the jars, label with contents and date, and store in a cool, dark, dry place for up to 12 to 18 months.
The four pillars of safe canning
Headspace is one of four variables a tested canning recipe controls. The other three are acidity (which determines whether a boiling-water bath is sufficient or a pressure canner is required), processing time at a specified temperature, and the processing method itself. Changing any one of the four — even something as apparently minor as leaving an extra 1/4 inch of air — can break the chain. Modern USDA and extension-service recipes state all four precisely; pre-1989 cookbooks often omit or misstate one or more, which is why heirloom recipes need to be re-validated before they are trusted for low-acid foods.
Why the gaps are not arbitrary
Each standard gap is matched to how much the food expands, how much liquid it releases, and how dense the final pack is. Dense, low-acid vegetables and proteins expand a great deal and are also the foods most dependent on a strong vacuum for shelf stability, so they get the largest headspace in the largest jars. Jams and jellies, by contrast, are dense, high-acid, high-sugar gels that barely move; too much headspace would leave useless oxygen and risk surface darkening, so they seal at a tight 1/4 inch.
Common signs of incorrect headspace
- Too little: food pushed under the lid, sticky seal surface, siphoning during processing, buckled or unsealed lids after cooling.
- Too much: air pocket large enough to darken the top layer of food, weak or slow-to-form seals, lids that flex when pressed.
- Correct: flat lid with a slight downward dip, no food on the rim, clear liquid at the proper fill line, seal audibly 'ping' as jars cool.
Common uses
Tips & pitfalls
- Always measure headspace after de-bubbling, not before — food settles and the gap can shrink by 1/4 inch or more.
- Use a dedicated headspace tool, the graduated end of a bubble freer, or a flat plastic ruler; eyeballing the gap is the single most common cause of failed seals in home canning.
- Too little headspace causes food to be forced up under the lid and the jar to fail to seal, or to buckle the lid; too much headspace leaves excess oxygen that can darken the top layer and weaken the vacuum as the jar cools.
- Wipe the rim with a damp cloth or paper towel after every adjustment — any bit of food, fat, or syrup on the sealing surface will break the seal.
- For raw-packed vegetables, fill slightly above the final target and expect the level to drop after the jar settles in the canner.
- Starch-thickened foods such as soups, stews, and purées expand aggressively; follow the recipe's specific headspace instruction rather than a generic rule.
- If a recipe is older than 1989, re-validate its headspace and processing time against current USDA or Ball guidelines — recommendations have changed for many foods, notably tomatoes and low-acid vegetables.
- Do not reuse single-use flat lids, and do not force bands fingertip-tight to 'make it seal' — over-tightening prevents air from venting and can buckle the lid.
Good to know
- Definition
- The empty space between the top of the food/liquid and the underside of the canning lid, measured before sealing and processing.
- Why it matters
- Provides expansion room during heat processing and, on cooling, creates the vacuum that pulls the lid down for a safe airtight seal.
- Reference standard
- USDA Complete Guide to Home Canning (rev. 2015), the Ball Blue Book Guide to Preserving, and the National Center for Home Food Preservation.
- Standard gaps
- 1/4 in (6 mm), 1/2 in (12 mm), 1 in (25 mm), and 1-1/4 in (3 cm), each tied to specific food categories.
- When to measure
- After running a bubble remover around the inside of the jar — food can settle by 1/4 in or more.
- Applies to
- Water-bath canning of high-acid foods and pressure canning of low-acid foods in standard Mason-type jars.
- Authority
- USDA / Cooperative Extension Service guidelines supersede older family recipes when they conflict.
- Common tools
- Dual-ended plastic or stainless headspace/bubble tools (often marked 1/4, 1/2, and 1 in) sold in Ball, Kerr, and Bernardin canning kits.
Also called
Leaving Correct Headspace
Related

Confit
Cook slowly submerged in fat for silky tenderness and keeping

Cure
Draw out moisture with salt and time to preserve and concentrate

Pickle
Steep in acidic brine for bright, tangy, crunchy preservation

Ferment
Let friendly microbes transform food into tangy, complex flavor

Marinate
Soak in a seasoned mix to flavor and tenderize before cooking

Brine
Soak in salt water so meat stays juicy and seasoned throughout

Dehydrate
Slowly dry out moisture to concentrate flavor and extend shelf life

Cold-Smoke
Perfume cured food with smoke without cooking it through