Prep & Assembly
Slap and Fold (French Fold)
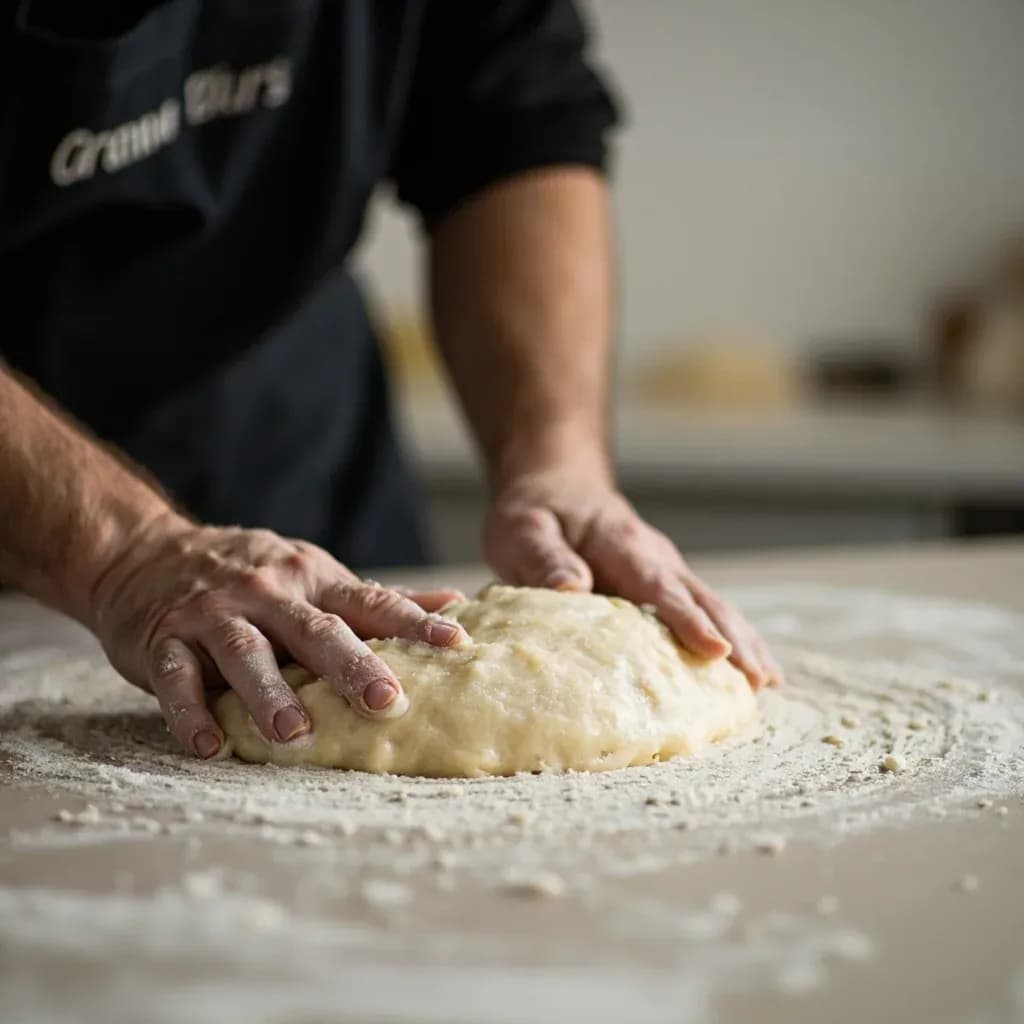
Stretching and slapping high-hydration dough on the counter to build gluten without flour.
Slap and fold, also called the French fold or Bertinet method, develops gluten in wet, sticky doughs by lifting the dough, slapping it onto the counter, then folding it over itself repeatedly. The rhythmic stretching strengthens the dough quickly without adding flour that would dry it out, making it ideal for high-hydration breads like ciabatta. The dough transforms from a shaggy, sticky mass into a smooth, elastic one.
The Slap and Fold — known in French boulangeries as *pétrissage à la frappe* or simply the French Fold — is a hands-on kneading method designed for doughs too wet to handle on a floured board. Instead of pushing dough against the counter with the heel of the hand, the baker lifts the mass upward so gravity stretches it, then slaps it down so the impact aligns the gluten strands in a single direction. The far edge is folded back over the body of the dough, the mass is rotated a quarter turn, and the sequence is repeated eight to twelve times.
Its value lies in what it does not do: no flour is added, no heat is generated through sustained friction, and very little gas is expelled. This makes it the technique of choice for high-hydration breads — ciabatta, focaccia, open-crumb sourdough, poolish baguettes — where conventional kneading would either require so much dusting that the dough dries out or would deflate the airy network the baker is trying to build. The work is also performed in short bursts with rests, which mirrors the way gluten actually develops: by aligning, relaxing, and aligning again rather than by relentless mechanical agitation.
The result is a dough that feels alive and slightly tacky rather than tight and satiny. It passes the windowpane test without the rigid, rubbery texture that prolonged machine mixing tends to produce, and its crumb will be irregular and open — the visible signature of a gas-retentive, lightly oxidized dough.
- Difficulty
- Medium
Types & varieties
Dough is lifted, slapped down, then folded over itself; the classic high-hydration method.
Gentler cousin performed in the bowl without the slap; preserves even more gas and is favored during bulk fermentation.
Dough is gathered under itself using wet hands; the most gas-retentive of the folding methods, used for very open crumbs.
Dough is folded into thirds like a business letter, typically in the bowl between sets of stretch-and-folds.
Older French synonym occasionally encountered in mid-century boulangerie manuals, named for the city of Reims.
How to do it
- 1
Prepare the workspace and dough
Clear a smooth, non-porous surface — marble, granite, or stainless steel work best. The dough should have completed autolyse or initial mixing and will look shaggy, sticky, and slack. Have a bench scraper and a bowl of cold water at hand.
- 2
Wet your hands
Run cold water over both hands and shake off the excess. The water film is what keeps the dough from sticking and should not noticeably change dough hydration.
- 3
Loosen the dough
Use the bench scraper to free the dough from its bowl. Slide your hands under opposite sides of the mass so you can lift it cleanly in one piece.
- 4
Lift and stretch
Raise the dough straight up and let it hang. Gravity alone will extend the gluten network by several inches — this is the moment most of the alignment happens.
- 5
Slap onto the counter
Bring the dough down firmly so it spreads into a rough rectangle about 1–2 cm thick. The impact finishes the alignment of the gluten strands.
- 6
Fold over itself
Grasp the far edge and fold it back over the nearer portion of the dough. Press lightly with your fingertips to seal.
- 7
Rotate and repeat
Rotate the dough 90° and repeat the lift, slap, and fold. Work quickly, aiming for 8–12 total folds in the first session.
- 8
Rest and reassess
Shape into a loose ball, scrape the surface clean, cover, and rest 15–20 minutes. After the rest, perform the windowpane test: a properly developed dough will stretch thin enough to see light through without tearing.
- 9
Proceed to bulk fermentation
When the dough is smooth, elastic, and holds its shape when lifted, transfer it to a container for bulk fermentation, or move directly to pre-shape and final shape.
Why no flour is added
Flour dusting during kneading is a habit carried over from low-hydration breads, where it keeps the dough from welding itself to the board. On a wet dough, however, that dusting gets folded back into the mass and silently lowers the hydration in the final crumb — producing a tighter, drier, more uniform texture than the recipe intended. The slap-and-fold sidesteps the problem by relying on a water film on the baker's hands and the slick surface of stone or steel to release the dough. The trade-off is mess: expect dough to spread and stick, and keep a bench scraper within reach. What you give up in tidiness you gain in crumb openness and a true expression of the recipe's hydration.
Choosing slap-and-fold over other folds
All four techniques in this family — slap-and-fold, stretch-and-fold, coil fold, and letter fold — develop gluten through repeated alignment rather than shear. They differ mainly in how much gas they expel and how much strength they impart in a single session.
- Slap-and-fold delivers the most aggressive alignment and is best used early, when the dough is still slack and shaggy.
- Stretch-and-fold is the workhorse for the middle of bulk fermentation: enough tension to keep gluten organized, gentle enough to retain gas.
- Coil fold is the lightest touch; reserve it for late bulk when the dough is fully aerated and you want to set the crumb without deflating it.
- Letter fold is efficient in a square container and works well for shaping doughs destined for pan loaves.
- Use the windowpane test as the final arbiter — if a small dough window tears, give it one more short fold set rather than switching methods midstream.
Common hydration ranges and what to expect
The feel of the dough changes sharply across the hydration spectrum, and so does the rhythm of the work.
- 70% hydration: dough is tacky but holds together; slap-and-fold feels almost like standard kneading and produces a tighter crumb.
- 75–78% hydration: the sweet spot for baguettes and pan loaves; dough spreads on impact but springs back when folded.
- 80–85% hydration: ciabatta and focaccia territory; expect the dough to look like a puddle at rest and only cohere after three or four fold sets.
Common uses
Tips & pitfalls
- Wet your hands with cold water before every lift; never flour them, since added flour alters hydration and tightens the final crumb.
- Use marble, granite, or stainless steel — wood absorbs surface moisture and the dough will glue itself down.
- Slap with conviction but not violence; the goal is to stretch the gluten, not to tear through it.
- Work in short sessions of 1–2 minutes followed by 15–20 minute rests; this lets the gluten relax and rehydrate and avoids over-oxidation.
- Stop when the dough feels alive, cohesive, and slightly tacky but no longer gluey — overworking produces a tough, rubbery crumb and bleaches the flour.
- Keep a bench scraper within reach to lift dough from hands and surface; gathering it into a ball before resting prevents it from spreading into a puddle.
- If the dough tears easily during the windowpane test, give it another short fold set rather than more aggressive work — wet gluten keeps developing during the rest.
- For doughs above 80% hydration, favor fewer but longer rest periods and let gravity do most of the alignment; aggressive slapping at very high hydration tends to tear the dough rather than organize it.
Good to know
- Also known as
- French Fold, Pétrissage à la Frappe
- Best hydration range
- 70%–85% hydration doughs
- Typical duration
- 10–15 minutes of active work, split into 2–4 short sessions over 30–60 minutes
- Equipment needed
- Smooth, non-porous countertop (marble, granite, or stainless steel); bench scraper; no added flour
- Key effect
- Aligns gluten strands while preserving internal gas and avoiding over-oxidation
- Often paired with
- Autolyse, stretch-and-fold, coil fold, and bulk fermentation
- Origin
- Traditional French artisan technique; codified in modern bread literature by Raymond Calvel, Jeffrey Hamelman, and Peter Reinhart
Also called
French Fold · Bertinet Method
Related

Whisk
Beat ingredients smooth and aerated with a looping wire motion

Sift
Pass dry ingredients through mesh to aerate and remove lumps

Strain
Pour through mesh to separate solids from liquid for a smooth result

Filter
Pass liquid through fine material to clarify out the smallest particles

Rice
Press cooked potatoes through small holes for fluffy, lump-free texture

Mash
Crush soft cooked food into a rustic, creamy purée

Grind
Crush food into a coarse to fine texture, from spices to meat

Grate
Shred food into fine bits against a sharp-toothed surface