Prep & Assembly
Wet Masala / Spice Paste Grinding
Grinding aromatics and spices with liquid into a smooth wet paste base.
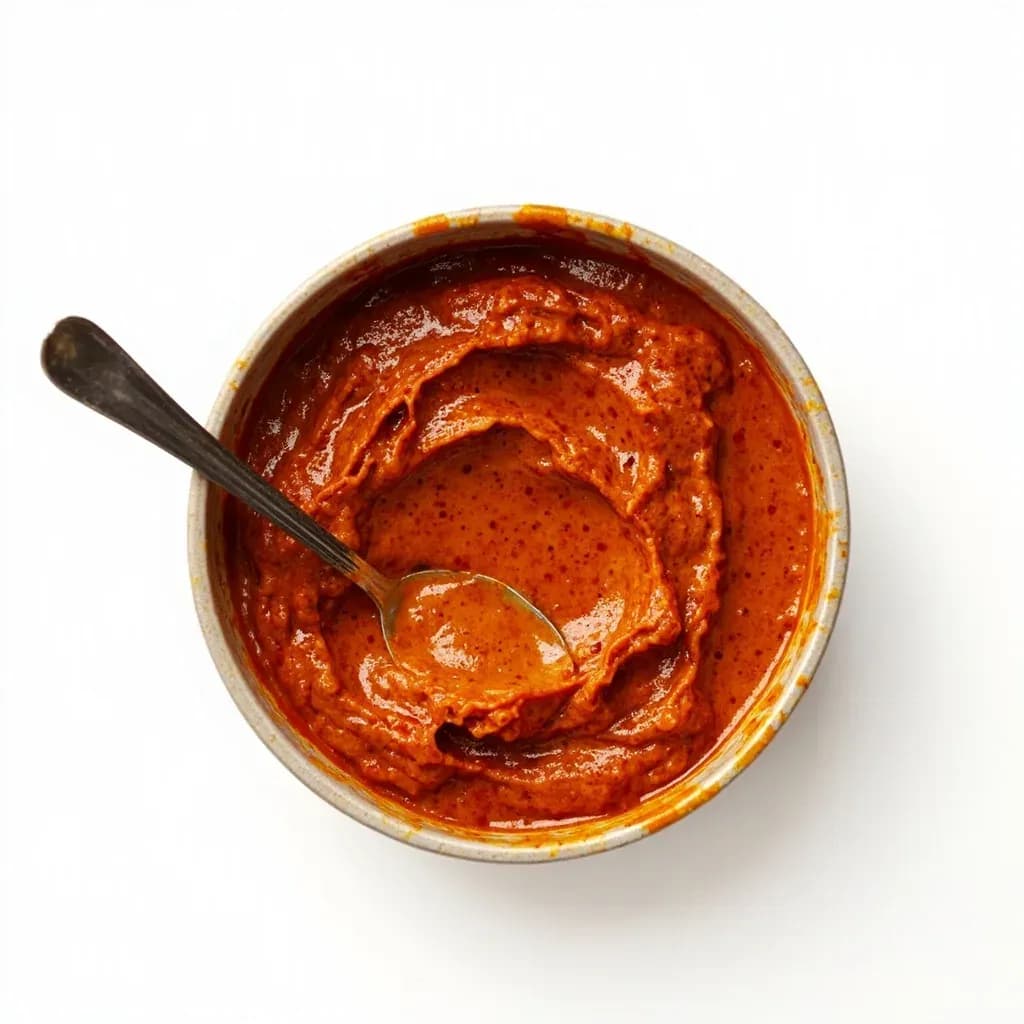
This technique grinds fresh aromatics like onion, garlic, ginger, and chilies together with spices and a little water or oil into a smooth wet paste. Such pastes, called masala, rempah, or bata, form the flavor foundation of curries and braises across South and Southeast Asia. Grinding on stone or in a blender releases oils and binds the aromatics, and frying the paste before adding other ingredients cooks out its raw edge.
Wet masala grinding is the technique of pulverizing aromatics and spices with a small amount of liquid into a smooth, pourable paste that becomes the flavor backbone of a dish. Unlike a dry spice powder, a wet paste forces essential oils, starches, and cell-wall pigments into a single homogenous base that clings to meat, rice, or vegetables and disperses evenly through a sauce. Chopping aromatics and frying them takes 30–45 minutes to break down; a pre-ground paste needs only a few minutes in the pan to release the same depth, which is the structural difference between everyday home cooking and the silken gravies of Indian restaurants, Thai curry houses, and Malaysian night markets.
The practice runs from Mughal-era North India through the temple kitchens of Kerala, the granite mortars of Bangkok, and the grinding stones of Penang. Each tradition has tuned the ratio of dry spices to wet aromatics, the choice of liquid (water, vinegar, tamarind water, coconut milk, yogurt), and the grinding time, but the principle is shared: pre-toasting the dry spices, layered loading, and slow liquid addition produce a paste that cooks into a finished sauce in minutes.
Treat the paste as a concentrate. Two to three tablespoons will flavor a dish for four, so what tastes balanced on the spoon will taste slightly under-seasoned in the pan, where the paste meets fat, protein, and additional water. Salt and acid both accelerate cell-wall breakdown and shape the final balance, so correct it at the grinding stage; you cannot correct it later.
- Difficulty
- Medium
Types & varieties
Sautéed onion, tomato, ginger-garlic, and dry spices; the North Indian and Mughlai gravy backbone for butter chicken, rogan josh, and korma.
Equal parts ginger and garlic with a splash of water or vinegar; the everyday workhorse of Indian home cooking.
Coconut (fresh or roasted), curry leaves, whole spices, and tamarind water; thinner and green-tinted, the base for Kerala and Chettinad dishes.
Dry-pounded in a granite mortar first, then moistened to a very fine texture; built on lemongrass, galangal, shrimp paste, and chilies.
Shallots, garlic, ginger, candlenuts or macadamias, turmeric, and lemongrass pounded into a thick aromatic base for rendang, laksa, and nasi goreng.
Kashmiri chilies, vinegar, garlic, ginger, cumin, cinnamon, and cloves; tangy, with a built-in preserving acidity.
Panch phoron bloomed in mustard oil, ground with onion, ginger, and a little water; the foundation of macher jhol.
Fresh red chilies, shallots, garlic, belacan, and lime; coarse or smooth; Indonesian, Malaysian, and Singaporean table condiment and cooking paste.
Fried onion, yogurt, whole spices, ginger-garlic, mint, and coriander; a thick marinade that clings to meat and rice during cooking.
How to do it
- 1
Select and prep ingredients
Decide on your base aromatics—onion, garlic, ginger, shallot, chilies, herbs—and chop roughly into ½-inch pieces so the grinder can catch them. If using whole dry spices (cumin, coriander, pepper, cardamom, cinnamon, cloves), measure them out and keep them separate from the wet aromatics until you have toasted them.
- 2
Toast whole spices
Heat a small dry skillet over medium-low and toast the whole spices 30–90 seconds, swirling, until fragrant and a shade darker. Transfer immediately to a plate to cool; residual pan heat will otherwise cook the aromatics during the wet grind.
- 3
Layer the grinder in the right order
Add hard items first: chopped onion or shallot, whole garlic cloves, whole chilies, then the toasted spices. Pulse 3–4 times to break them down. Add softer items next: ginger, fresh herbs, tomato, or grated coconut. Soft items last because they bruise and oxidize quickly under the blade.
- 4
Add liquid gradually
Pour in 1 tablespoon of liquid at a time—water for neutral flavor, vinegar for sharper preserved pastes, oil for richer results, coconut milk for coastal styles, yogurt for marinade-style pastes. Pulse, scrape down, and add more liquid only as needed to reach a thick, spoon-coating consistency.
- 5
Grind to target texture
Blend or pound continuously for 1–3 minutes, pausing every 30 seconds to scrape the sides and let the motor rest. By hand, work in firm circular strokes for 15–20 minutes, adding drops of liquid to keep the stone wet. Target texture: smooth enough to spread, not runny.
- 6
Adjust seasoning and finish
Taste a small dab on the back of a spoon—the paste will be concentrated. Add salt, a pinch of sugar, or a squeeze of lemon or tamarind to balance. For a glossier finish, blend in 1 tablespoon of hot oil or ghee at the very end.
- 7
Strain for restaurant smoothness (optional)
Press the paste through a fine-mesh tamis or chinois using the back of a ladle. Discard the coarse fibrous residue or save it for stock. This single step is what gives fine-dining Indian and Thai gravies their silken body.
- 8
Store or use immediately
Use the paste straight into a hot pan with oil or ghee, or transfer to a clean jar. Pour a thin layer of oil on top, seal, and refrigerate up to 2 weeks, or freeze in cubes for up to 6 months.
Choosing your liquid and acid
The liquid you grind with is the first seasoning decision you make, and it shapes the finished dish. Water is neutral and lets the spices speak; use it for a base that will be cooked with strong additional ingredients (tomato, coconut milk, stock). Vinegar sharpens and preserves, making it the right choice for vindaloo and other long-keeping pastes. Tamarind water brings sour-sweet depth for South Indian and Bengali work. Yogurt enriches and tenderizes, ideal for biryani and tandoori marinades. Coconut milk or coconut water gives a coastal, slightly sweet base for Kerala and Thai pastes.
Acid matters as much as salt. A squeeze of lemon, a spoon of tamarind, or a glug of vinegar at the end of grinding brightens the paste, balances the fat-soluble aromatics, and—critically—extends refrigerator life.
- Water: neutral, all-purpose, short shelf life
- Vinegar: sharp, preserving, classic for vindaloo and chili pastes
- Tamarind water: sour-sweet, traditional for South Indian and Bengali
- Yogurt: enriching and tenderizing, for marinades
- Coconut milk/water: coastal, slightly sweet, for Kerala and Thai styles
- Finish with a squeeze of lemon, tamarind, or vinegar for brightness and balance
Storing paste for weeknight cooking
A big batch of masala paste is the single most useful form of weeknight prep an Indian, Thai, or Malaysian cook can do. Once the paste is made, transfer it to a clean glass jar and pour a 2–3 mm layer of neutral oil, ghee, or melted coconut oil on top before sealing. The oil blocks oxygen and slows both oxidation and mold; refrigerated, the paste keeps two weeks, often longer if the acid content is high.
For longer storage, freeze in 1-tablespoon portions in ice-cube trays, then pop the cubes into a labeled freezer bag. A single cube dropped into a hot pan with a splash of oil thaws in under a minute and seasons a curry for two. Thicker pastes (biryani masala, vindaloo) freeze better than thin coconut-based pastes, which can split on thawing—re-emulsify those with a fast whisk into hot coconut milk.
- Seal with a thin oil or ghee layer to block oxidation
- Refrigerate up to 2 weeks; freeze up to 6 months
- Portion into 1-tbsp ice-cube trays for measured weeknight use
- Discard if color darkens, a sour/fermented smell appears, or mold shows
- Coconut-milk pastes may split when thawed; whisk back into hot liquid
Common uses
Tips & pitfalls
- Toast whole dry spices in a dry pan for 30–60 seconds before grinding; raw grinding leaves fat-soluble aromatics locked in the seed coat.
- Load hard ingredients (onion, garlic, whole chilies) first and pulse before adding softer items like ginger, herbs, or tomato.
- Feed liquid a tablespoon at a time—too much at once makes a watery slurry that cannot be thickened back.
- Use a wet grinder or stone mortar for the smoothest, restaurant-grade result; a high-speed blender can overheat and dull bright notes.
- Add 1–2 teaspoons of salt early; salt helps break down cell walls and speeds emulsification, while a final squeeze of acid (lemon, tamarind, vinegar) balances the concentrate.
- Strain through a fine tamis or chinois if a velvety gravy is the goal—this is the standard in fine-dining Indian restaurants.
- Pause the blender every 30 seconds; friction heat can cook aromatics and mute their brightness, especially with chilies and herbs.
- Do not over-process leafy herbs like cilantro or mint—add them at the end in short pulses to preserve color and freshness.
Good to know
- Origin
- Indian subcontinent, with documented Mughal-era recipes (Nuskha-e-Shahjahani, ca. 18th century) building on older Ayurvedic spice-aromatic preparations; shared across South and Southeast Asia.
- Equipment (traditional)
- Stone mortar and pestle (sil-batta), flat grinding stone (ammi kallu) with rolling stone, or wet grinder with granite drums.
- Equipment (modern)
- High-powered blender, food processor, Indian-style mixer-grinder (mixie) with chutney jar, or dedicated wet grinder.
- Liquid ratio
- Roughly 2–4 tablespoons liquid per cup of dry/ground ingredients; adjusted by eye to a thick, spoon-coating consistency.
- Grinding time
- 5–10 minutes in a wet grinder; 1–3 minutes in a power blender; 15–20 minutes by hand with a sil-batta.
- Target texture
- Smooth enough to coat the back of a spoon; very fine pastes (Thai-style) pass through a tamis or chinois.
- Storage
- Up to 2 weeks refrigerated in a sealed jar with a thin oil layer on top; up to 6 months frozen in ice-cube trays or flat freezer bags.
- Heat note
- Friction heat builds quickly in a blender; pause every 30 seconds to keep aromatics from cooking and losing their bright top notes.
Also called
Wet Masala Grinding · Spice Paste Grinding (Bata) · Blending Rempah (Kisar) · Grinding Aromatic Paste · Masala-Paste-Making
Related

Whisk
Beat ingredients smooth and aerated with a looping wire motion

Sift
Pass dry ingredients through mesh to aerate and remove lumps

Strain
Pour through mesh to separate solids from liquid for a smooth result

Filter
Pass liquid through fine material to clarify out the smallest particles

Rice
Press cooked potatoes through small holes for fluffy, lump-free texture

Mash
Crush soft cooked food into a rustic, creamy purée

Grind
Crush food into a coarse to fine texture, from spices to meat

Grate
Shred food into fine bits against a sharp-toothed surface