Prep & Assembly
Thawing
Safely defrosting frozen food before cooking to preserve quality and safety.
Thawing brings frozen food back to a workable temperature before cooking. Done safely, it means defrosting in the refrigerator, under cold running water, or in the microwave, never at room temperature where bacteria multiply in the warm outer layer. Refrigerated thawing is slowest but safest, while a sealed bag under running water speeds things up without risking the cold chain.
Thawing is the controlled reversal of freezing — gently returning ice crystals back to free water so a frozen ingredient can be seasoned, cooked, or eaten evenly. It earns its own place in any serious kitchen reference because it sits at the intersection of food safety and final quality: thaw too fast or at the wrong temperature, and bacteria multiply long before the inside has warmed up; thaw carelessly, and you lose moisture, flavor, and texture before the food ever reaches heat. The underlying rule is simple — perishable food must not spend time in the "danger zone" between 40°F and 140°F (4–60°C), the range in which pathogens double in minutes. Every recommended method (refrigerator, cold water, microwave) is designed to keep the food below 40°F (4°C) from start to finish, just at different speeds.
The three safe methods sit on a clear speed-versus-safety spectrum. Refrigerator thawing is slowest but most forgiving: large roasts can rest for days without ever leaving the safe zone, and the food can be refrozen if plans change. Cold water thawing trades a little attention for roughly a tenfold speedup — about 30 minutes per pound instead of 5 hours — as long as the package stays sealed and the water is refreshed. Microwave defrosting is the fastest route but partially cooks the edges and forces you to finish the food immediately. A fourth option deserves mention: many frozen items — vegetables, sausages, breaded portions, even some cuts of meat — can simply be cooked from frozen, skipping thawing altogether.
Planning is the real secret to good thawing. Most home cooks lose quality not because they picked the wrong method, but because they started too late, leaving a half-frozen roast to finish in a warm kitchen. A 12-pound turkey needs about three full days in the refrigerator; a thick steak needs 12–24 hours; a single chicken breast can be ready overnight. Match the method to the item, the timeline, and the dish — and treat the rules below as a habit rather than a checklist.
- Difficulty
- Easy
Types & varieties
Slowest and safest; the food stays below 40°F/4°C throughout. Ideal for large roasts, whole birds, fish, and anything planned 1–3 days ahead.
Submerged in cold, regularly refreshed water inside leak-proof packaging. Roughly ten times faster than the fridge and the best middle-ground method.
Fastest method via a low-power defrost setting; edges partially cook and food must be finished immediately. Best for small portions in a hurry.
Not technically a thaw, but a valid alternative for many vegetables, breaded items, sausages, and some cuts of meat that go directly into cooking.
How to do it
- 1
Refrigerator thawing (safest)
1. Move the frozen item from the freezer to the refrigerator (40°F/4°C or below) with enough lead time — about 24 hours per 5 lb for whole birds and roasts, less for thin cuts. 2. Place it on a plate, in a pan, or on a rimmed tray to catch drips, and position on the bottom shelf to keep juices away from ready-to-eat food. 3. Keep the food in its original sealed packaging to retain moisture and limit surface exposure to air. 4. Allow it to thaw gradually: small items may be ready in 4–12 hours, large roasts in 2–4 days. 5. Cook within 1–2 days of full thaw, or refreeze if plans change.
- 2
Cold water thawing (faster)
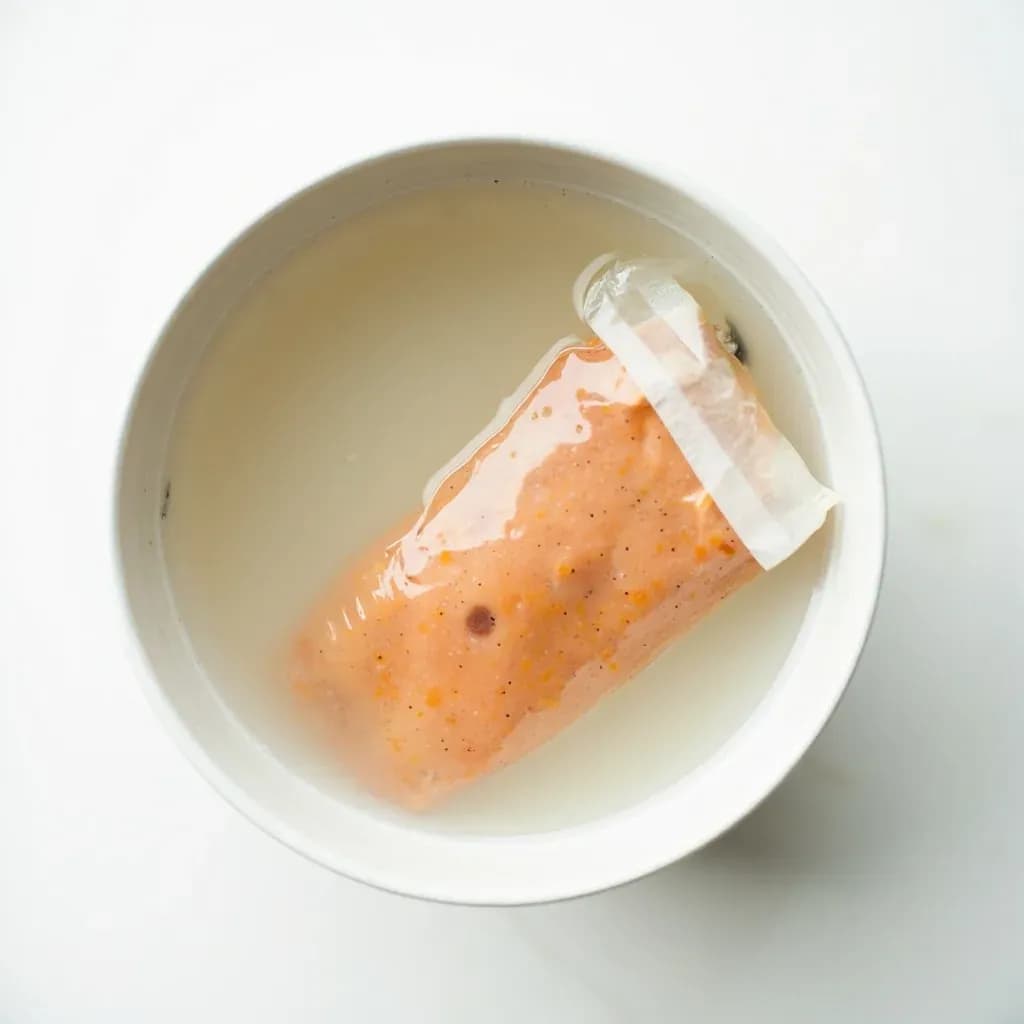
1. Confirm the food is in a leak-proof, sealed package — vacuum-sealed or heavy zip-top bags with no holes work; transfer loose items into a sealed bag first. 2. Fill a large bowl or clean sink with cold tap water (60°F/16°C or colder). 3. Submerge the package fully, weighing it down with a heavy plate if it tries to float. 4. Change the water every 30 minutes to keep the bath below 40°F/4°C. 5. Budget about 30 minutes per pound — a 4-lb roast should thaw in roughly 2 hours. 6. Cook the food immediately after thawing; do not refreeze without cooking first.
- 3
Microwave thawing (fastest)
1. Remove the food from its original store packaging, especially foam trays and absorbent pads, and place it in a microwave-safe dish. 2. Select the defrost setting (typically 30–50% power) and enter the weight or food category if the microwave prompts. 3. Pause every 1–2 minutes to flip, rotate, or separate pieces; move loosened portions to a separate plate as they release. 4. Expect some edges to begin cooking — this is normal and is exactly why the food must be cooked right away. 5. Cook immediately after thawing; do not let it rest at room temperature.
- 4
Cooking from frozen (no thaw)
1. Skip thawing entirely for items that are designed for it: most frozen vegetables, peas, corn, diced mirepoix, breaded fish portions, sausages, ground meat patties, and many stir-fry cuts. 2. Increase total cooking time by roughly 50% compared with the thawed equivalent, and start at a slightly lower temperature so the inside can thaw as the outside cooks. 3. For meats, verify doneness with an instant-read thermometer at the center of the thickest part — target the same final internal temperature as the thawed version. 4. Use a hot pan or hot oven to drive off surface moisture and encourage browning rather than steaming.
The danger zone, in plain terms
Bacteria that cause foodborne illness — Salmonella, E. coli, Listeria, Staphylococcus aureus — multiply most aggressively between 40°F and 140°F (4–60°C). Freezing does not kill them; it pauses them. The moment food enters the danger zone, the clock starts, and bacterial counts can double every 20 minutes. A frozen roast left on the counter does not thaw from the outside in evenly — the surface spends hours in the danger zone while the core is still ice. Safe thawing is fundamentally about keeping the surface below 40°F until the very end, which is why every approved method involves cold water, refrigeration, or a brief microwave burst that is cooked immediately.
- The danger zone is 40–140°F (4–60°C); aim to keep food below 40°F/4°C the entire time it is thawing.
- Bacterial growth is fastest near body temperature (~98°F/37°C) — never let a warm kitchen be your thawing environment.
- Freezing halts but does not kill bacteria, so previously frozen food must still be handled safely after thawing.
Refreezing thawed food
Refreezing is safe only when the food has spent no significant time in the danger zone. Food thawed in the refrigerator never left it, so it can go straight back into the freezer, though some quality loss from ice-crystal damage is normal. Food thawed by cold water or microwave should be cooked first before being refrozen, because the temperature history is harder to verify and the cells have already been disrupted twice. Expect further texture loss in either case. As a rule of thumb, if you would not serve it now, do not refreeze it.
Common uses
Tips & pitfalls
- Plan ahead: a 12-lb turkey needs about three full days in the refrigerator. Move it from freezer to fridge before you even think about the rest of the menu.
- Always place thawing items on a tray, rimmed sheet pan, or in a dish to catch drips, and keep them on the bottom shelf of the fridge so juices cannot drip onto ready-to-eat food.
- For cold water thawing, the package must be truly leak-proof — submerge in cold tap water and refresh it every 30 minutes. Never use warm or hot water; it warms the food's surface into the danger zone and partially cooks the exterior.
- Pat thawed proteins dry with paper towels before searing. Surface moisture prevents browning, drops pan temperature, and essentially steams the meat instead of crusting it.
- For mild white fish that has developed any ammonia-like or "fishy" notes from freezer burn, submerge it in milk in the refrigerator while it thaws — the proteins and fats leach out off-flavors and leave a sweeter, fresher-tasting fillet.
- Once food has thawed in the microwave, treat it as partially cooked and finish it immediately. Do not let it sit on the counter while you prep something else.
- Smaller, thinner pieces thaw dramatically faster than thick roasts. Slice or portion large items into steaks, chops, or fillets before freezing to make future thaws quick and even.
- If a piece is only partially thawed when you need it, finish the job in cold water rather than leaving it on the counter — even 20 minutes at room temperature moves the surface into the danger zone.
Good to know
- Danger zone
- 40–140°F (4–60°C); perishable food should pass through this range as quickly as possible, and safe thaw methods keep it below 40°F/4°C the entire time.
- Refrigerator thawing rate
- Roughly 24 hours per 5 lb (about 5 hours per lb), depending on density, thickness, and air circulation in the fridge.
- Cold water thawing rate
- About 30 minutes per pound when the water is changed every 30 minutes to stay below 40°F/4°C.
- Maximum room-temperature time
- No more than 2 hours total (1 hour if the room is above 90°F/32°C). This is a hard ceiling for the entire thawing-plus-prep window.
- Microwave defrost power
- Typically 30–50% of full power; food must be cooked immediately afterward because the edges begin to cook.
- Refreezing rule
- Food thawed in the refrigerator can be refrozen raw; food thawed by cold water or microwave must be cooked first before refreezing.
- Post-thaw hold time
- Raw meat, poultry, and fish thawed in the fridge should be cooked within 1–2 days.
- Equipment typically required
- Refrigerator, leak-proof bag, large bowl, or microwave — chosen to match the method and timeline.
Also called
Defrosting · Refrigerated Thawing · Running-Water Thawing
Related

Whisk
Beat ingredients smooth and aerated with a looping wire motion

Sift
Pass dry ingredients through mesh to aerate and remove lumps

Strain
Pour through mesh to separate solids from liquid for a smooth result

Filter
Pass liquid through fine material to clarify out the smallest particles

Rice
Press cooked potatoes through small holes for fluffy, lump-free texture

Mash
Crush soft cooked food into a rustic, creamy purée

Grind
Crush food into a coarse to fine texture, from spices to meat

Grate
Shred food into fine bits against a sharp-toothed surface