Water & Steam
Blanch and Shock
Briefly boiling food then plunging it into ice water to set color and halt cooking.
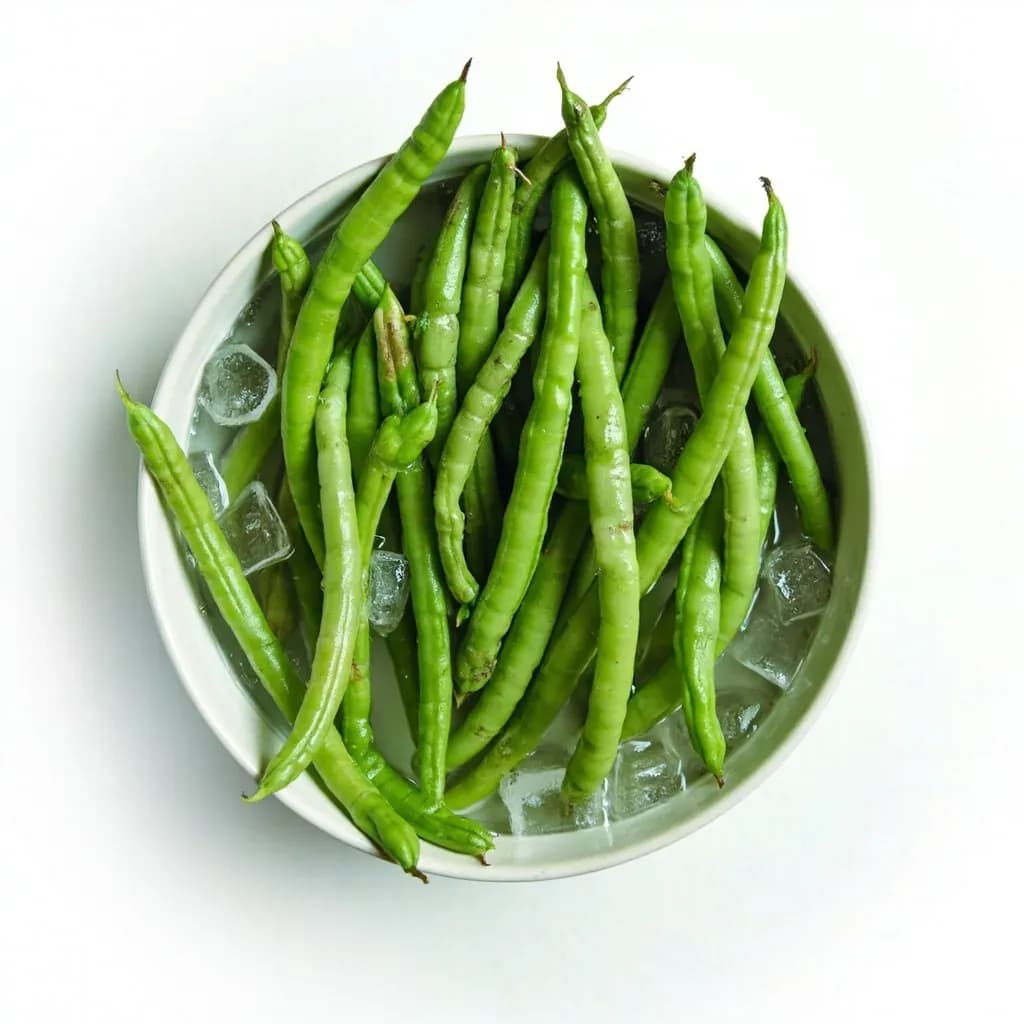
Blanch and shock drops food into boiling water for a short burst, then immediately into ice water to stop the cooking instantly. It sets the vibrant green of vegetables, loosens skins on tomatoes and peaches, and parcooks produce for later use. The ice bath is the crucial second half, locking in color, texture, and nutrients before residual heat overcooks the food.
Blanch and shock is the two-step thermal workhorse of the professional kitchen: a timed dip in boiling salted water followed by an equally timed plunge into ice water. The boiling half drives the surface of the food past the point where enzymes, heat, and oxygen would otherwise degrade it, while the ice half stops the cooking dead in its tracks. Done well, the technique leaves a vegetable that looks, tastes, and behaves like it was picked minutes ago — vivid green, crisp to the tooth, and free of the dull, sulfurous edge that hot-holding or steam-table carryover would otherwise impose.
The method solves three problems at once. It deactivates the enzymes that otherwise cause frozen vegetables to develop off-flavors and discoloration over months of storage. It locks in the bright chlorophyll of green vegetables by collapsing the air pockets in the cells and driving out the gases that would react with cell acids to turn the color olive or khaki. And it gives the cook precise control over final texture, since the moment the food hits the ice it is, in practical terms, frozen in time. Running shocked food under cold tap water cools too slowly, and skipping the chill sacrifices the color and texture that make the effort worthwhile.
Because it is so common, blanch and shock is also one of the most mis-executed techniques in the home kitchen. The pot is too small, the water is barely simmering, the ice bath is an afterthought, and the food sits in a colander on the counter for a minute before anyone remembers to chill it. None of those steps are hard — the equipment is a stockpot, a bowl, and ice — but the technique is unforgiving of inattention, which is why it is worth setting up with the same care a line cook brings to it.
- Difficulty
- Easy
Types & varieties
The standard method; food is submerged in a large volume of boiling salted water.
Used for corn on the cob, leafy greens, and some starchy items; preserves more water-soluble nutrients.
A brief pre-cook before a finishing step, as with french fries, vegetables destined for gratins, or stir-fry ingredients.
A short immersion in hot oil, used to blister the skins of dried chiles or to set the surface of potatoes for crisper roasting.
Used before freezing; faster and retains nutrients well, but cooks less evenly than water blanching.
A very short dip of 15–60 seconds to loosen the skins of tomatoes, stone fruit, garlic, or almonds.
How to do it
- 1
Set up the ice bath
Fill a large bowl or a clean sink with half ice and half cold water. It should be at least the volume of the blanching pot, because the temperature of the bath will rise sharply when hot food is added. Position it within arm's reach of the stove.
- 2
Bring a generous pot of water to a rolling boil
Fill a tall stockpot about two-thirds full and add 1–2 tablespoons of kosher salt per gallon. Wait for a true rolling boil — not a simmer — before adding any food.
- 3
Add the food in small batches
Lower the food in loose, in a wire basket or with a spider. Avoid crowding; every piece needs to move freely in the water so it cooks in the time you intend. Bringing the pot back to a boil takes longer with more food, and the extra minutes throw off the timing.
- 4
Time from the moment the boil returns
Start the timer the instant the water comes back to a full boil, not when the food went in. Most tender green vegetables need 1–3 minutes; denser roots need 3–5; tomatoes and stone fruit destined for peeling need only 15–60 seconds.
- 5
Drain and shock immediately
Lift the food out with a spider or drain through a colander and plunge it straight into the ice bath. Swirl briefly so every piece is submerged and chills evenly. A delay of even 15 seconds at this stage can dull the color of delicate greens.
- 6
Cool for roughly the same length of time as the blanch
Leave the food in the ice water for about as long as it spent in the boiling water, until it is cold to the bite. Don't leave it longer, or it will absorb water through the softened cells and go limp and watery.
- 7
Drain and dry thoroughly
Lift the food out, drain in a colander, and spread on clean kitchen towels or paper towels. Pat dry. Surface water dilutes dressing, prevents browning, and causes oil to splatter in a hot pan.
- 8
Use, hold, or freeze
Use the food right away (sauté, roast, dress for a salad), refrigerate for up to a day covered with a damp towel, or portion, label, and freeze. For freezing, dry the vegetables thoroughly first to prevent ice crystals and clumping.
The science of color and texture
The vivid green of a just-picked vegetable comes from chlorophyll held inside tightly packed cells. Once a vegetable is cut or heated, two things conspire against that color. The cell walls begin to soften and release their internal gases, and those gases — combined with acids released from the cells — react with the magnesium at the center of the chlorophyll molecule, replacing it with hydrogen and producing pheophytin, a dull olive-brown pigment. A quick boil drives the gases out of the cells faster than the acid can do its work, and a fast chill freezes the structure in that state. The result is a vegetable that looks like it was just picked rather than cooked.
Texture follows a similar logic. Plant cells are held together by pectin, which softens with heat. Pulling the food into ice water before the pectin has fully broken down leaves the cells just firm enough to bite through cleanly. Leave the food sitting in the hot water a minute too long, or skip the shock, and the pectin dissolves past the point of no return — the vegetable goes limp and waterlogged, and no amount of chilling will bring it back.
Equipment and setup
A well-organized station is the difference between a good blanch and a frustrating one. The blanching pot should be tall and narrow rather than wide and shallow, so the water recovers its temperature quickly when food goes in. A wire mesh blanching basket or a simple spider is essential for fast, clean transfer. The ice bath should be at least equal in volume to the pot, and it should be set up before the water comes to a boil — by the time the blanch is finished, the cook should be able to lift, drain, and drop in a single motion.
- Tall, narrow stockpot (8–12 quarts for most home batches)
- Wire blanching basket or long-handled spider
- Colander for draining if no basket is used
- Large bowl or clean sink for the ice bath, half ice and half cold water
- Clean kitchen towels or paper towels for drying shocked vegetables
Common uses
Tips & pitfalls
- **Use more water than you think you need.** A large volume recovers temperature quickly when food is added. A small pot crashes in temperature, cooks unevenly, and produces the very dull, soft vegetables this technique is meant to prevent.
- **Salt the water generously.** One to two tablespoons of kosher salt per gallon seasons the food all the way through and helps green vegetables stay vivid. The water should taste pleasantly salty, like a mild soup.
- **Make the ice bath first and make it big.** A small bowl of lukewarm water with a few cubes floating in it is not an ice bath. Use a generous amount of ice — it melts fast, especially with hot food dropped in. A clean sink is often the right vessel for home batches.
- **Don't skip the drying step.** Shocked vegetables that go directly into a salad or a hot pan will water down dressing, prevent browning, and cause oil to splatter. Pat them dry on clean towels before the next step.
- **Don't leave the food in the ice bath too long.** The point of shocking is to stop the cooking, not to soak. Once the food is cold to the bite, lift it out. Sitting longer in the water is the most common cause of limp, waterlogged vegetables.
- **Watch out for carryover.** Even 15 seconds in a colander on the counter can dull the color of delicate greens. Move the food from boiling water to ice bath in one continuous motion.
- **Save the blanching water.** It is full of flavor and nutrients. Strain it and use it as a base for soups, stocks, risotto, or cooking grains.
- **Use baking soda sparingly — or not at all.** A small pinch will push greens to a brighter color, but it also breaks down pectin and turns the texture to mush if you use too much.
Good to know
- Technique type
- Two-step thermal process: brief boil followed by rapid chill
- French terms
- Blanchir (to blanch) and rafraîchir (to refresh or cool)
- Water-to-food ratio
- About 1 gallon (3.8 L) of water per pound (450 g) of food
- Salt in blanching water
- 1–2 tablespoons (15–30 g) per gallon; seasons vegetables and helps them stay green
- Water temperature
- True rolling boil, 212°F / 100°C at sea level
- Ice bath temperature
- Target near 32°F / 0°C; aim for 35–40°F once food is added
- Typical blanch time (green vegetables)
- 1–4 minutes depending on density
- Shock time
- Roughly equal to the blanching time, until food is cold throughout
Also called
Blanching and Shocking · Refreshing
Dishes that rely on it
Related

Boil
Cook in vigorously bubbling liquid at full rolling heat

Simmer
Hold liquid at a gentle shimmer for tender, unhurried cooking

Poach
Cook gently in barely-trembling liquid for silky, tender results

Steam
Cook in rising vapor to keep color, nutrients, and shape intact

Blanch
Plunge briefly in boiling water, then shock cold to lock color

Braise
Sear, then cook slow in a little liquid until fall-apart tender

Stew
Simmer bite-sized pieces fully submerged into a rich, unified pot

Sous-Vide
Seal and cook in precise warm water for edge-to-edge doneness