Water & Steam
Bulk Braising
Braising large quantities of meat or vegetables in shared liquid for batch cooking.
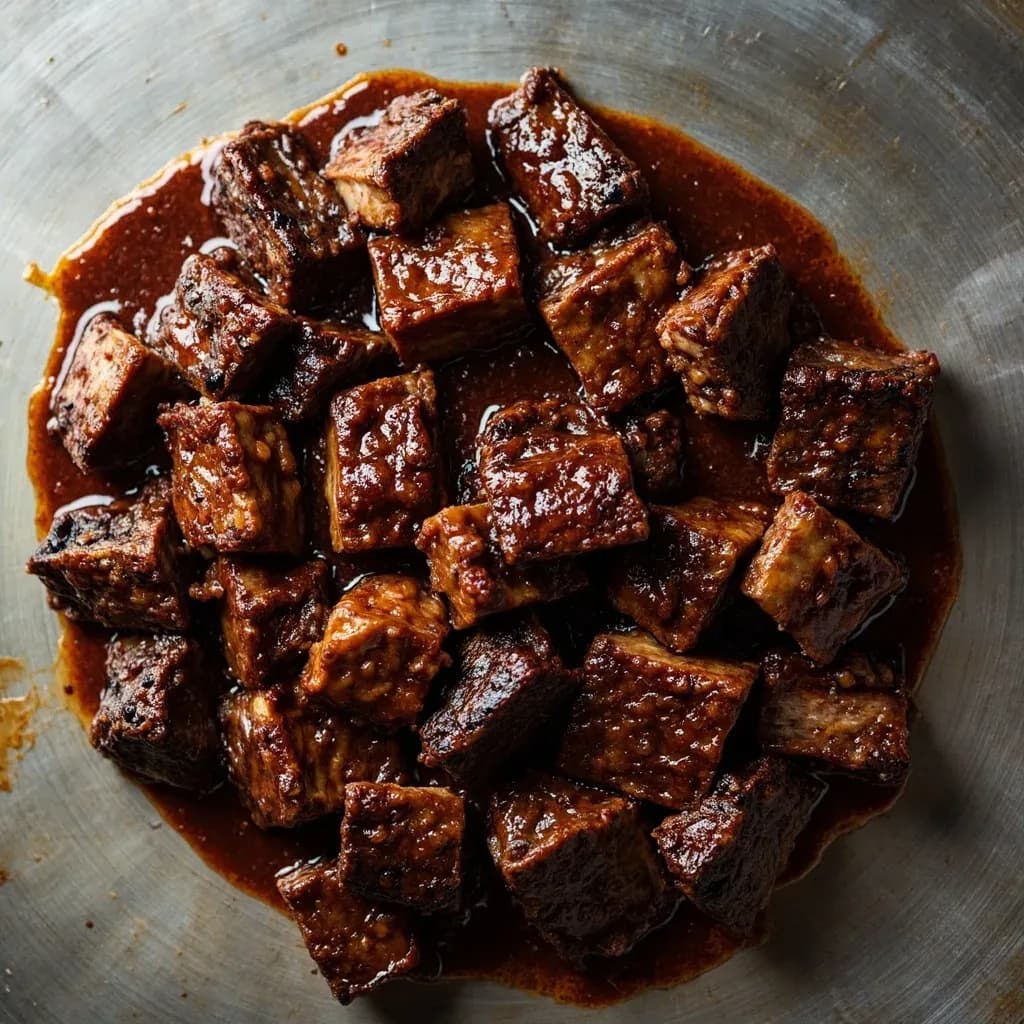
Bulk braising scales the classic braise — searing then slow-cooking in a small amount of liquid — to large batches in deep rondeaus or combi ovens. It's used in restaurants and catering to cook many portions of stews, short ribs, or greens at once with even, gentle heat. Even browning and not overcrowding the pan remain critical so the liquid simmers rather than steams.
Bulk braising is the catering and institutional adaptation of classical braising, where multiple portions of tough, collagen-rich protein cook together in a single shared aromatic liquid inside a deep hotel pan, braiser, rondeau, or steam-jacketed kettle. It is not a different cooking method so much as a re-engineered workflow: searing happens in small batches in one vessel, the cook happens en masse under a tight cover at low oven heat, and finishing happens from one large batch rather than portion by portion. The payoff is twofold — efficiency (one fond-laden liquid carries the whole dish, one sear feeds dozens of plates) and flavor concentration, because the liquid that surrounds thirty pounds of beef chuck is fundamentally richer than the liquid that surrounds a single steak.
What changes at scale is precision. Uniform trimming, careful sequencing of vegetable add-ins, and a separate final reduction of the cooking liquid become non-negotiable, because uneven portions lead to overcooked edges and seasoning drift in a twelve-quart volume is much harder to correct than in a two-quart pot. The technique is unusually forgiving on time — the long, low cook window forgives late service and gets better overnight as collagen fully relaxes and the sauce takes on body — but unforgiving on temperature, lid discipline, and overcrowding the sear. For cooks feeding a family of eight or a banquet of two hundred, bulk braising turns the cheapest cuts in the case into the most satisfying dishes on the menu.
- Difficulty
- Medium
Types & varieties
Items arranged in a deep hotel pan or braiser, covered, cooked in a low oven — the most common institutional method.
Cooked on a large tilting skillet or rectangular braising pan with a lid; allows easy sauce reduction and pouring.
Conducted in a steam-jacketed kettle for very large volumes (50+ portions); gentle, even heat from the jacket.
Done in a heavy covered rondeau or stockpot on a low burner; common in smaller catering and home batch cooking.
Submerged and cooked in fat rather than liquid; produces very tender, naturally preserved product.
Held at 200–225°F for 8–12 hours; a workhorse for catering prep and community suppers.
Sear in one vessel, slide the seared product into a hotel pan with liquid for oven finishing; speeds service in banquet kitchens.
Liquid built largely on red or white wine with minimal stock — coq au vin, beef bourguignon, daube.
Italian osso buco, cacciatore, and Sunday-gravy styles with tomato, soffritto, and herb base.
Pot-au-feu or light Asian-style braises: clear stock, mirepoix, bouquet garni, neutral seasoning.
How to do it
- 1
Plan the batch and preheat
Calculate total weight of protein and vegetables, then choose a vessel with enough depth — typically a 6–8 inch full hotel pan or a deep braiser for 12–25 pound batches. Preheat the oven to 300–325°F for a moderate braise, or 200–225°F for an overnight low-temperature hold. Position racks so the pan sits centered with airspace above for the lid.
- 2
Trim, portion, and season
Cut proteins into uniform 1.5–3 pound pieces so they cook at the same rate. Pat dry with towels — surface moisture is the enemy of a good sear. Season aggressively with salt and pepper at least 30 minutes ahead, ideally overnight uncovered on sheet pans in the cooler. Prep the mirepoix, aromatics, and any tomato or wine components in advance.
- 3
Sear in batches
Heat a thin layer of high-smoke-point oil or clarified butter in the braising vessel over high heat. Sear the protein in small batches, 2–3 minutes per side, until a deep brown crust forms. Transfer each batch to a holding hotel pan. Never crowd — if pieces touch, they will steam and you will forfeit the fond that drives the dish.
- 4
Build the braising base
Reduce heat to medium. Sweat the mirepoix, garlic, and any paste (tomato, miso, gochujang) in the rendered fat, scraping up every bit of fond. Deglaze with wine, beer, or sherry and reduce by half. Add stock or water until the volume is enough to come 1/2 to 2/3 up the side of the protein. Return the seared meat and accumulated juices to the pan; add bouquet garni and whole spices.
- 5
Cover and cook low and slow
Cover the vessel tightly with a lid, foil, or a hotel-pan cover. Transfer to the preheated oven. Maintain a gentle simmer — small bubbles breaking the surface occasionally. A rolling boil will toughen the meat and reduce the sauce too fast. Plan 1.5–2 hours for chicken, 2.5–3.5 hours for pork shoulder and lamb shoulder, and 3–4 hours for beef chuck and oxtail.
- 6
Manage add-ins and skim
Skim surface fat and scum with a ladle every 30–45 minutes. Add hardy vegetables (carrots, potatoes, turnips) 45–60 minutes before the end of cook time, and delicate vegetables (fennel, leeks, cabbage wedges) in the last 20–30 minutes. Test the protein with a fork or instant-read thermometer; it should slide in with no resistance and read 195–205°F for red meat or 175–185°F for poultry.
- 7
Rest, separate, and finish
Pull the pan from the oven and rest, covered, for 20–30 minutes. Lift the proteins out and hold in a warm hotel pan with a splash of cooking liquid. Strain the braising liquid, skim fat aggressively, and reduce on the stove to a nappé consistency that lightly coats a spoon. Adjust salt, acid (a splash of wine, vinegar, or citrus), and mount with cold butter for shine if serving now.
- 8
Hold, portion, or chill
For service, hold at 140°F or above in a warmer, or cool rapidly in shallow pans, label, date, and refrigerate in the cooking liquid for up to 4 days. Reheat gently in a 300°F oven covered with a splash of stock; bulk meats always reheat better in their own liquid to prevent drying out.
What Changes When You Scale Up
The single biggest mental shift in bulk braising is that you are cooking a sauce as much as you are cooking a protein. The liquid surrounding the meat will become the sauce on the plate, which means everything that happens to it — how aggressively you deglaze, how much you reduce the wine, whether you skim fat during the cook — has ten times more impact than it would in a single-portion braise. Searing in small batches becomes mandatory, not a refinement: a crowded pan steams the meat, prevents crust, and forfeits the fond that drives the whole dish. Resting and finishing the sauce separately is also not optional at scale, because the cooking liquid that has bathed protein for three hours will taste of its best and worst extremes, and a quick stovetop reduction is the only way to bring it into focus.
- Sear in batches no larger than will leave 1–2 inches between pieces in the pan.
- Build the braising base in the same vessel that held the sear; every drop of fond is a flavor deposit you cannot get back.
- Skim fat every 30–45 minutes during the cook, or chill and lift congealed fat before finishing.
- Finish the sauce in a separate wide saucepan so it reduces quickly and evenly.
- Taste the liquid at three points — after deglazing, mid-cook, and after final reduction — and adjust salt and acid in stages.
Choosing Cuts and Add-Ins for a Crowd
Bulk braising rewards the cuts that punish other techniques. Beef chuck, pork shoulder, lamb shoulder, veal shank, oxtail, and whole chicken legs all convert long, slow, moist heat into tenderness without drying out, and they all price well below the prime cuts. For vegetables, choose hard roots that can stand hours in liquid — carrots, parsnips, turnips, rutabaga, celery root, and waxy potatoes all welcome a full braise. Delicate or quick-cooking items (peas, leafy greens, fresh herbs, ripe tomatoes) should be stirred in at the very end, off heat or in the last few minutes, so they keep their color and texture.
- Hardy roots: add 45–60 minutes before the end of cook time for whole pieces, 20–30 minutes for cut into 1-inch chunks.
- Delicate vegetables (fennel, leeks, cabbage wedges): add in the last 20–30 minutes.
- Fresh herbs, peas, greens, citrus zest: stir in after the pan comes off heat.
- Trim proteins to uniform 1.5–3 lb pieces so they finish in the same window.
Common uses
Tips & pitfalls
- Sear in small batches; overcrowding the pan steams the meat and forfeits the fond that drives the dish's flavor.
- Pat proteins completely dry and season at least 30 minutes ahead — moisture is the enemy of a good crust.
- Build the braising liquid in the same pan used for searing to capture every bit of fond; this is where bulk braising gains depth over individual portions.
- Hold the liquid at 1/2 to 2/3 up the side of the meat; fully submerging washes out flavor and dilutes the final sauce.
- Skim fat off the surface during cooking for a cleaner sauce, or chill the liquid overnight and lift the congealed fat if working ahead.
- Add quick-cooking vegetables, fresh herbs, and greens only at the end; add hardy roots early or in the last 45–60 minutes depending on cut size.
- Rest the meat in its liquid, covered, for at least 20–30 minutes so carryover heat can finish tenderizing and redistribute juices.
- Reduce the strained braising liquid separately to adjust seasoning and consistency — never rely on the cooking liquid alone for plating sauce.
- Use low-sodium stock and season in layers, because large volumes turn undersalted fast and are almost impossible to fix at the end.
- Avoid lifting the lid repeatedly; each lift drops oven temperature and stretches cook time noticeably in a covered hotel pan.
- Label and date pans clearly — bulk-braised foods are a frequent food-safety concern because of long cook-and-hold cycles.
- Thicken the finished sauce with a beurre manié or cold butter mount rather than flour during the cook, which can turn gummy at volume.
Good to know
- Category
- Moist-heat batch cooking technique
- Origin
- French braisage tradition; modern bulk form developed with 20th-century institutional and catering kitchens
- Cooking medium
- Shared aromatic liquid (stock, wine, tomato, fond-based pan liquid) at low simmer
- Oven temperature
- 275–325°F (135–163°C) for standard braises; 200–225°F (93–107°C) for overnight holds
- Cook time
- 1.5–4 hours standard; 8–12 hours for overnight low-temperature work
- Liquid level
- 1/2 to 2/3 up the side of the main ingredient, not fully submerged
- Doneness target
- 195–205°F (90–96°C) internal for red meat; 175–185°F (79–85°C) for poultry, both judged fork-tender
- Best equipment
- Full-size hotel pans (12×20 in), oval and rectangular rondeaux, braising pans, tilting skillets, steam-jacketed kettles
- Yield
- 8 to 100+ portions per batch, scaling with pan depth and protein weight
- Make-ahead
- Improves overnight; chill in cooking liquid, reheat gently to serve
- Food cost
- Tough, cheap cuts are preferred; one shared liquid cuts labor and waste vs. individual portions
Also called
batch braising
Related

Boil
Cook in vigorously bubbling liquid at full rolling heat

Simmer
Hold liquid at a gentle shimmer for tender, unhurried cooking

Poach
Cook gently in barely-trembling liquid for silky, tender results

Steam
Cook in rising vapor to keep color, nutrients, and shape intact

Blanch
Plunge briefly in boiling water, then shock cold to lock color

Braise
Sear, then cook slow in a little liquid until fall-apart tender

Stew
Simmer bite-sized pieces fully submerged into a rich, unified pot

Sous-Vide
Seal and cook in precise warm water for edge-to-edge doneness