Heat & Fire
Briquette-Count Heat Control
Regulating Dutch-oven temperature by counting and placing lit charcoal briquettes.
A camp- and Dutch-oven technique where the number of lit briquettes set on the lid versus underneath dictates the cooking temperature. A common rule adds and subtracts briquettes from the oven's diameter to hit a target temp, with a top-heavy ratio for baking and a bottom-heavy ratio for simmering. Rotating the oven and lid periodically prevents hot spots.
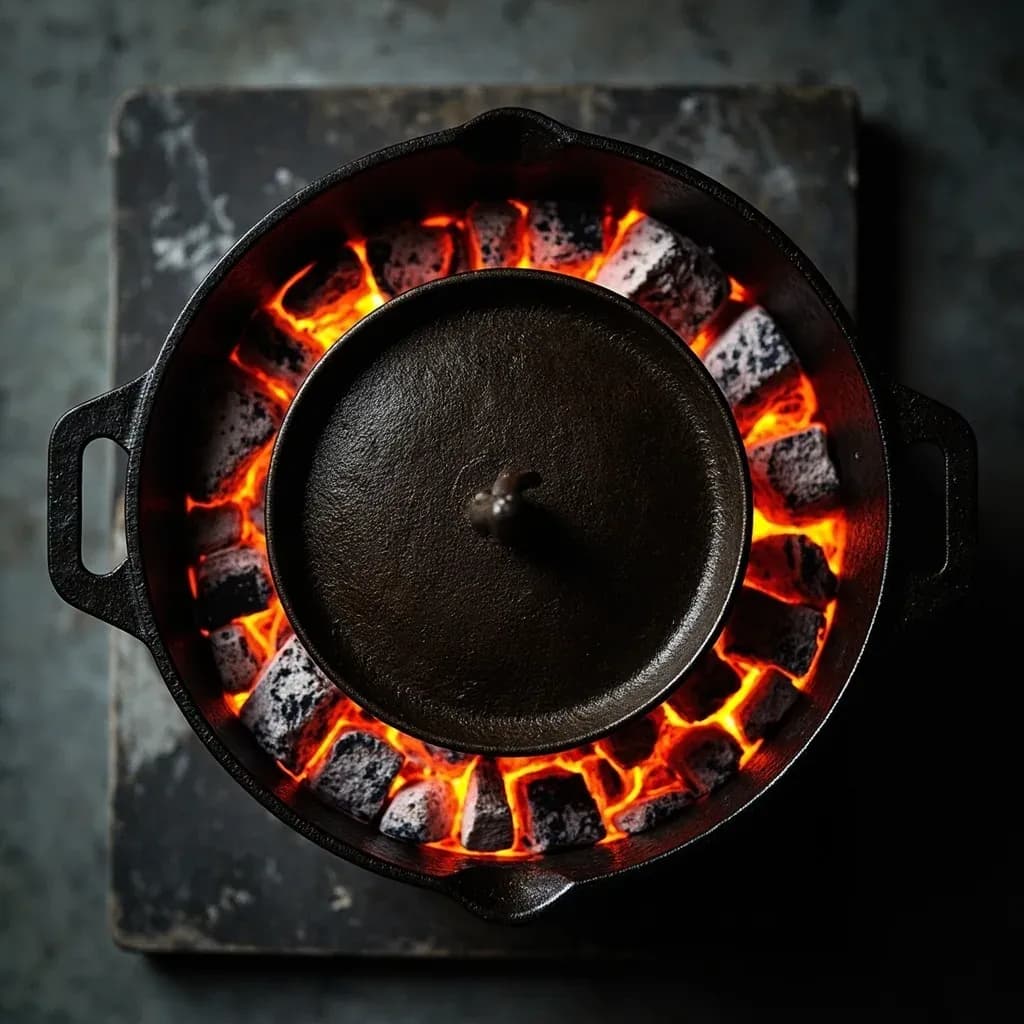
Briquette-count heat control is the camp cook's analog to setting a kitchen oven dial. Instead of turning a thermostat, the cook decides on a target temperature, measures the Dutch oven across the rim, and places a fixed number of lit charcoal briquettes above and below the pot in a prescribed ratio. Because the cast-iron body of a Dutch oven holds a great deal of heat and the lid has comparatively little thermal mass, the convention is roughly twice as many briquettes on the lid as beneath the pot — typically one on top per inch of diameter and one on the bottom per two inches. Done correctly, the pot holds a steady 325–350 °F, the workhorse baking temperature most outdoor recipes are written for.
The system is less a scientific law than a useful convention. A fully ashed standard briquette delivers roughly 40–50 °F of usable heat to a closed oven, but that figure drifts with wind, lid fit, and how dark the pot's interior has seasoned. What the count gives you is reproducibility — far more than placing coals by eye — which is why the method has become the lingua franca of sanctioned Dutch-oven cook-offs and scout outdoor cooking.
The system was codified in the 1980s by the International Dutch Oven Society and spread through scouting programs, where it doubles as a lesson in fractions and heat dynamics as much as in cooking. Lump charcoal enthusiasts reject the count because individual pieces vary too widely in heat output, but for teaching, competitions, and the simple goal of predictable heat from a campfire, nothing has displaced it.
- Difficulty
- Medium
Types & varieties
1 briquette per inch on top, 1 per 2 inches on the bottom. The workhorse configuration for breads, cobblers, cakes, and roasts at about 350 °F.
Equal numbers top and bottom, both at 1 per inch. Drives the pot to 400–450 °F for deep-frying, pasta, and rapid boils.
Total briquette count reduced by about one-third from the baking formula. Holds 225–275 °F for stews, beans, and long braises.
Add 3–4 extra briquettes to the baking total and cluster them directly under the food for a fast Maillard crust on roasts or thick chops.
All briquettes on the lid, none beneath, for finishing or browning the top of a dish — sometimes called a Dutch-oven broiler setup.
How to do it
- 1
Choose the configuration
Decide on a target temperature. For baking, use 1 briquette on top per inch of pot diameter and 1 on the bottom per 2 inches. For boiling, use 1-up / 1-down. For simmering, reduce the baking total by about one-third.
- 2
Count the briquettes
Measure the Dutch oven's diameter rim-to-rim (inside edge to inside edge, just below the handles). For a 12-inch oven baking at roughly 350 °F, count 12 top and 6 bottom. Lay them out separately on a heat-safe surface so the top and bottom sets never get mixed.
- 3
Light and ash the briquettes
Light the full count in a chimney starter or a single pile. Wait until every briquette is coated in a uniform gray-white ash — usually 15–20 minutes. Unashed briquettes will not deliver their rated heat and will smoke heavily.
- 4
Place the bottom briquettes
Using long tongs, arrange the bottom briquettes in a pattern that supports the pot's feet or legs. For most camp ovens a tight triangle (3) or square (4) works well; for a flat-bottomed oven, space them evenly across the base and keep the center clear to avoid scorching.
- 5
Set the Dutch oven
Set the oven squarely on the bottom briquettes. On a leg-style camp oven, the legs are designed to sit on or among the briquettes, with the center of the pot base left clear of direct heat. On a flat-bottomed oven, set a metal trivet or grate across the briquettes first, or arrange the briquettes in a ring around the base rather than directly under the center.
- 6
Load the food and lid
Add food to the pot, seat the lid, and confirm it is properly seated — even a small gap throws the count's effect off.
- 7
Place the top briquettes
With tongs, set the top briquettes on the lid in an even ring roughly 1 inch in from the rim. Avoid the handle bail; it conducts heat and will burn gloves.
- 8
Rotate and monitor
Every 15 minutes, rotate the lid 90° so the lid-briquette cluster sweeps across a new quadrant. Add or remove briquettes to hold the target temperature. Check doneness only when the rotation schedule allows.
- 9
Recover heat after lifting
If you must open the pot, replace the lid and add 1–2 fresh, ashed briquettes to the top to recover the lost heat within a few minutes.
- 10
Rest and extinguish
When the cook is done, transfer the food to a warmer, then close the bottom vents (if any) and douse remaining briquettes with water or seal them in a metal can — never leave them unattended in dry grass.
Why the 1-up / ½-down ratio works
The ratio is not a physical law but an empirical fit. The cast-iron body of a Dutch oven is a deep heat sink; once warmed, it releases stored heat back into the food for a long time. The lid, by contrast, is a thin disc with far less thermal mass than the pot body, so it needs more fuel input to reach the same surface temperature. To match the radiant heat pouring down from the lid cluster, you only need about half as much fuel beneath the pot. Wind, sun, and how dark the pot's interior has seasoned all nudge the actual interior temperature, which is why experienced cooks treat the count as a starting point rather than a guarantee.
- A well-seasoned, dark-lined pot radiates heat better and can usually shave one bottom briquette.
- A new, light-colored, or aluminum-lined oven reflects more heat and needs 1–2 extra top briquettes to compensate.
- Lump charcoal rejects the count system because piece-to-piece output varies by 30–50%; briquettes are uniform enough to make the math work.
Adjusting the count to conditions
No two sites cook the same. Treat the standard 1-up / ½-down count as a baseline and tune from there during the first 30 minutes of a cook.
- Steady wind: build a foil windbreak on the upwind side; even a moderate breeze can drop interior temperature 25–50 °F, and a couple of extra top briquettes will usually recover the loss.
- A heavy cast-iron oven with a tight-fitting, well-seasoned lid runs slightly hotter than a lighter or newer one — the count can often come down by a single top briquette.
Common uses
Tips & pitfalls
- Always count and place briquettes only after they are fully ashed; counting or moving them too early is a common cause of off-temperature cooks.
- Mark the lid handle with a small notch or piece of tape so you can rotate the lid 90° each cycle and track coverage at a glance.
- Arrange bottom briquettes in a triangle (3) or square (4) pattern under the pot's feet — never directly under the center, which scorches food where the heat meets the pot floor.
- Place top briquettes in a ring about 1 inch in from the rim, not clustered in the center; this drives heat down the pot's walls where most food sits.
- In any steady breeze, build a foil windscreen on the upwind side; even a gentle wind can strip 25–50 °F from the cook.
- Resist the urge to peek — every lid lift can drop interior temperature 20–30 °F and stretch cook time by several minutes.
- Light with a chimney starter or electric starter instead of lighter fluid; the residue does not change the count but it does flavor the food.
- After the cook, shut the bottom draft or smother the bottom briquettes to stop heat; lid briquettes will keep radiating for another 10–15 minutes and can scorch anything left in the pot.
Good to know
- Standard top-heat rule
- Place 1 fully ashed briquette on the lid for every inch of Dutch-oven diameter (10 briquettes on top for a 10-inch oven).
- Standard bottom-heat rule
- Place 1 fully ashed briquette under the pot for every 2 inches of diameter (5 beneath a 10-inch oven, 6 beneath a 12-inch).
- Target temperature
- The 1-up / ½-down ratio holds the pot at roughly 325–350 °F (170–175 °C), the conventional Dutch-oven baking temperature.
- Heat contribution per briquette
- A fully ashed-over standard briquette contributes about 40–50 °F of usable heat to a closed Dutch oven; the figure varies with wind, lid fit, and pot seasoning.
- Briquette readiness
- Briquettes should be fully lit and covered in a thin gray-white ash before counting and placement — usually 15–20 minutes after lighting.
- Wind penalty
- Steady wind can drop interior pot temperature 25–50 °F; a foil windscreen on the upwind side is standard practice.
- Lid-rotation interval
- Rotating the lid 90° every 15 minutes evens out hot spots from the briquette cluster on top.
- Origin
- Codified by the International Dutch Oven Society (IDOS), founded 1980; now standard at sanctioned cook-offs and in U.S. scouting outdoor cooking.
Also called
Top/Bottom Ratio · charcoal counting
Related

Sear
Blast the surface hot for a deep-browned, savory crust

Sauté
Cook quickly in a little fat over lively heat, tossing as you go

Stir-Fry
Toss bite-sized pieces over roaring heat for fast, smoky cooking

Pan-Fry
Crisp food in a shallow layer of hot fat, turning once or twice

Deep-Fry
Submerge in hot oil for an all-over crackling crust

Roast
Cook uncovered in dry oven heat for browned edges and tender centers

Bake
Cook with steady, surrounding oven heat — the soul of bread and pastry

Broil
Hit food from directly above with fierce overhead heat