Heat & Fire
Camp Roasting
Roasting food beside or over an open campfire using radiant heat.
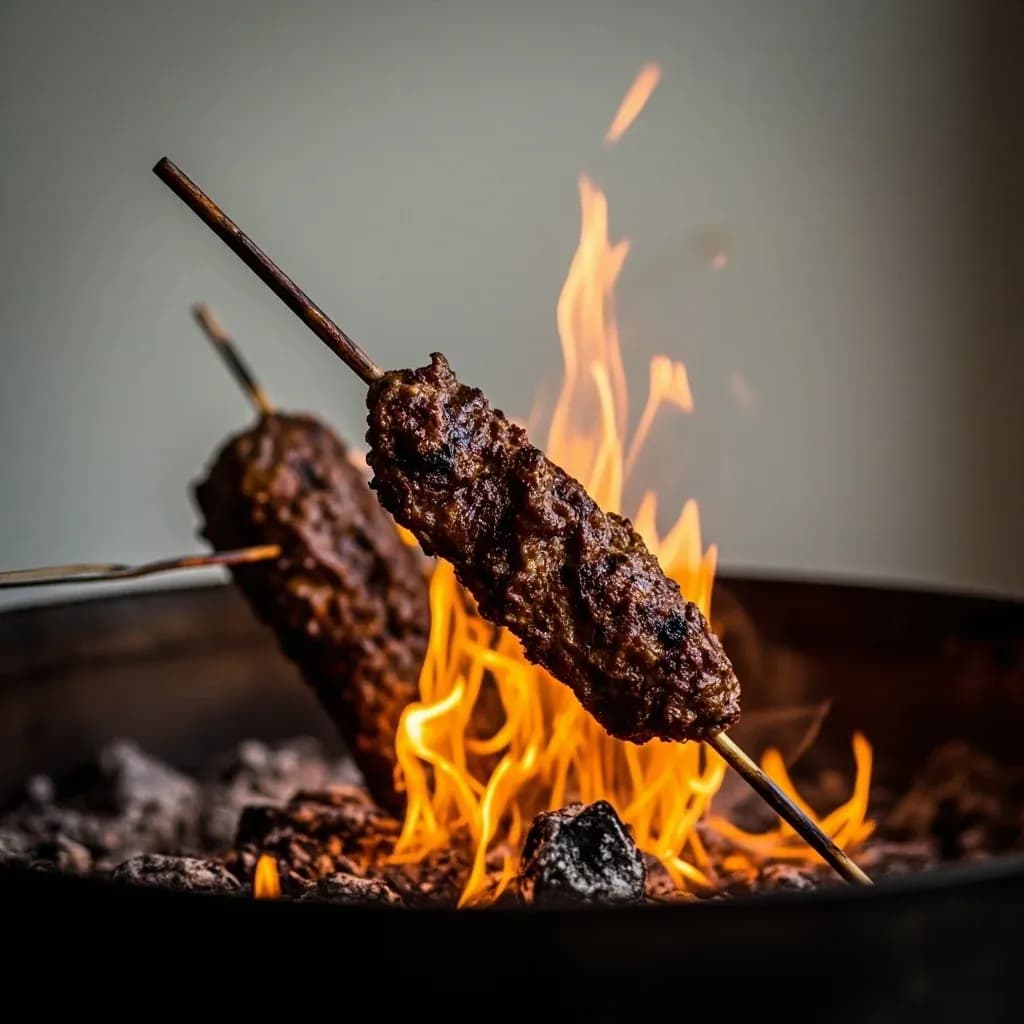
Camp roasting cooks meat, vegetables, or whole items near a campfire's coals or flame, relying on radiant and reflected heat rather than an enclosed oven. Cooks may skewer, spit, or lean food on sticks toward the fire, turning it to brown evenly. It demands managing distance from the heat and the fire's burn-down to coals for steady cooking.
Camp roasting is the original roasting method: food cooked beside or above a deep bed of glowing hardwood embers, drawing heat almost entirely from radiation rather than direct flame contact. It is distinct from grilling, where food sits over an open flame or sear-hot grate, and from smoking, where a low-temperature chamber is filled with cool wood smoke for hours. The defining feature of camp roasting is the coal bed itself — a collapsed, ash-dusted pile of embers that radiates steady, even heat from every direction it touches, much like the walls of a brick oven.
This is the technique that has produced rotisserie-style birds, slow-roasted joints, and crusty Dutch-oven loaves for as long as humans have cooked outdoors, and it remains central to many indigenous and pastoral cooking traditions. It rewards patience and fire craft in a way that a gas grill or kitchen oven never quite can: meat bastes itself as fat and juices meet radiant heat and develop a deep mahogany crust, while bread bakes with the dry, even top heat that only a pile of coals on a lid can supply. The trade-off is attentiveness — a coal bed is a living heat source, and the cook must learn to read it, rake it, and replenish it the way a stovetop cook learns a flame.
In practice, camp roasting behaves like a very hot, dry oven whose temperature is set by how close the food sits to the embers and how the coals are banked around it. A mature hardwood coal bed radiates roughly 700 to 1,100°F at its surface, but useful cooking heat drops off quickly with distance, so most roasting happens 8 to 14 inches from the coals for spits, or right among them for Dutch ovens and foil packets. Time, not a thermostat, is the variable — and that is exactly what makes the method worth learning.
- Difficulty
- Medium
Types & varieties
Food skewered on a horizontal pole turned beside the fire; the classic method for whole birds, legs of lamb, and porchetta. Rotation can be manual or driven by a crank, weight, or small motor.
Cast-iron pot with short legs set among or on coals, with more coals piled on the lid. Mimics a convection oven; the standard method for roasts, breads, and cobblers outdoors.
A pot or wrapped food suspended from a tripod of green poles over or beside the fire; useful for stews, stocks, and large joints hung on hooks.
Tightly wrapped food buried in hot coals or nestled beside them; common for fish, vegetables, and potatoes.
Flat river rocks or soapstone slabs leaned against the fire or stacked to form an oven; food cooks on the heated stone by radiant heat. Common in Nordic, Inuit, and Pacific Northwest traditions.
Small items threaded on green sticks or metal skewers and held near the coals rather than over open flame; the ember side dominates heat transfer.
Coals raked into a wall or ring around the food, creating reflected radiant heat from multiple sides without direct flame contact.
How to do it
- 1
Site the fire safely
Clear a 10-foot circle of leaves, grass, and duff. Set up on mineral soil, gravel, or a fire ring. Position the fire so wind carries smoke away from the cooking area and so the cook can stand upwind. Keep a water bucket and a shovel at hand.
- 2
Build the fire for coals, not flame
Stack seasoned hardwood in a log-cabin or teepee shape, light from the center, and let it burn through. After 45–60 minutes the structure will collapse into a deep bed of glowing embers — this is your cooking heat. Add a few larger split logs to the edge if you need to refresh the coal bed.
- 3
Set up the roasting rig
For spits, drive two green forked stakes (or use a purpose-built spit frame) into the ground on either side of the fire and rest the spit in the crotches. For a Dutch oven, set the pot near the fire to warm. For foil roasting, have wrappings and ties ready. For a tripod, lash three green poles together into a tripod with the cooking hook at the apex.
- 4
Position the food relative to the coals
Roasting happens beside the fire or above the coal bed, never in the flame. A typical spit sits 8–14 inches from the coals and rotates. A Dutch oven sits down into a shallow pit of coals with more coals shoveled onto the lid. Foil packets are nestled into (not under) the hottest embers.
- 5
Manage the heat through the cook
Add fresh splits to the edge of the fire as coals turn to ash. Rake fresh coals toward or away from the food to raise or lower temperature. For a Dutch oven, lift the lid and rotate the pot a quarter turn every 15–20 minutes and replenish lid coals as they burn down. For a spit, keep rotation slow and steady — about 2–4 RPM.
- 6
Baste, turn, and check doneness
Baste spitted meat every 20–30 minutes. Probe the thickest parts of meat with an instant-read thermometer; pull roasts a few degrees below the target to allow for carryover. Visual cues (clear juices, firm but yielding flesh, loose joints on birds) also matter when a thermometer is not practical.
- 7
Rest and serve
Transfer the food to a board or platter and tent loosely with foil. Allow 10–20 minutes for joints and whole birds. While it rests, rake remaining coals outward, drown them with water, stir, and drown again until cold to the touch — never bury or leave live coals behind.
Reading the Coal Bed
A coal bed is ready when the wood has stopped holding its shape and the embers glow uniformly beneath a fine gray ash. Visual cues: the bright orange flame has subsided, the surface of the embers is dusted with white-gray ash, and the bed sinks visibly when you press the back of a shovel into it. A snap or soft hiss under pressure is normal; a sharp pop means trapped sap or moisture — pull that piece aside. A bed that still shows black wood with red veins is too young; a bed reduced to fine powdery ash is too old. Plan to start roasting when the bed is at the 'uniform glow' stage, because it will only get cooler from there and you will be adding fresh splits to keep it going.
- Uniform gray ash over glowing red/orange = ready for roasting.
- Flames still licking above the wood = wait; live flame blackens food and deposits harsh smoke compounds.
- Coals that crumble to dust on touch = nearly spent; add fresh splits to the edge to rebuild.
- Hold a hand 4 inches above the bed: 6 seconds or more is medium heat for slow roasting, 4–5 seconds is hot, 2–3 seconds is searing, under 2 seconds is too hot for most food.
Common uses
Tips & pitfalls
- Wait for the flame stage to pass — glowing coals give steady, controllable radiant heat; live flames blacken the outside before the inside is done and contribute harsh smoke compounds.
- Bank coals to one side so you have a hot zone, a medium zone, and a cool zone in the same fire ring; move the food to manage temperature the way you would on a stovetop.
- Use a Dutch oven with a flat lid so you can pile coals on top; lid coals are what make it an oven rather than a pan.
- Pre-warm a camp oven near the fire before setting it on coals — a cold pot on hot coals can crack the iron.
- Trim surface fat and score skin on spitted meat; baste with a mop or brush every 20–30 minutes to keep it from drying out under the constant radiant heat.
- Wrap exposed wooden handles, spit ends, or twine-trussed birds in wet cloth or foil so they do not ignite.
- Use a clean hardwood for the last 20–30 minutes of the cook if you want smoke flavor; early smoke is largely wasted on cold meat that cannot yet hold volatiles.
- Always rest roasted meat 10–20 minutes under a loose foil tent; carryover heat will push internal temperature up another 5–10°F, and skipping the rest loses a lot of juice to the board.
- Test doneness with an instant-read thermometer rather than time alone — wind, fuel moisture, and coal depth make cook times unreliable.
- Keep a bucket of water or a pile of clean sand within arm's reach; never leave an open fire unattended, especially with grease rendering.
- Never cook over treated lumber, plywood, pallets, or driftwood pulled from the ocean — chemical residue and salt smoke make food unsafe or inedible.
Good to know
- Primary heat transfer
- Radiant heat from glowing coals and the side of the fire, not direct flame contact
- Preferred fuel
- Seasoned hardwoods — oak, hickory, maple, beech, birch, almond, and fruitwoods
- Avoid for cooking fuel
- Softwoods (pine, fir, spruce, cedar) and any treated, painted, or glued wood — they smoke heavily, deposit creosote, and taste acrid
- Lead time for coals
- Build the fire 45–60 minutes before cooking so it can collapse into a deep, even bed of glowing embers
- Coal-bed temperature
- A mature hardwood coal bed radiates roughly 700–1,100°F at the surface; usable cooking heat drops off rapidly with distance
- Heat control method
- Distance from coals and how the coals are banked or raked, rather than a thermostat or valve
- Typical cookware
- Spits and forks, cast-iron camp/Dutch ovens (often with legs), heavy-duty aluminum foil, heavy cast-iron skillets, and tripods with hooks or chains
- Skill level
- Intermediate — requires fire management, heat judgment, and longer unattended times than grilling
Also called
open-fire roasting
Dishes that rely on it
Related

Sear
Blast the surface hot for a deep-browned, savory crust

Sauté
Cook quickly in a little fat over lively heat, tossing as you go

Stir-Fry
Toss bite-sized pieces over roaring heat for fast, smoky cooking

Pan-Fry
Crisp food in a shallow layer of hot fat, turning once or twice

Deep-Fry
Submerge in hot oil for an all-over crackling crust

Roast
Cook uncovered in dry oven heat for browned edges and tender centers

Bake
Cook with steady, surrounding oven heat — the soul of bread and pastry

Broil
Hit food from directly above with fierce overhead heat