Prep & Assembly
Hydration / Water Mixing
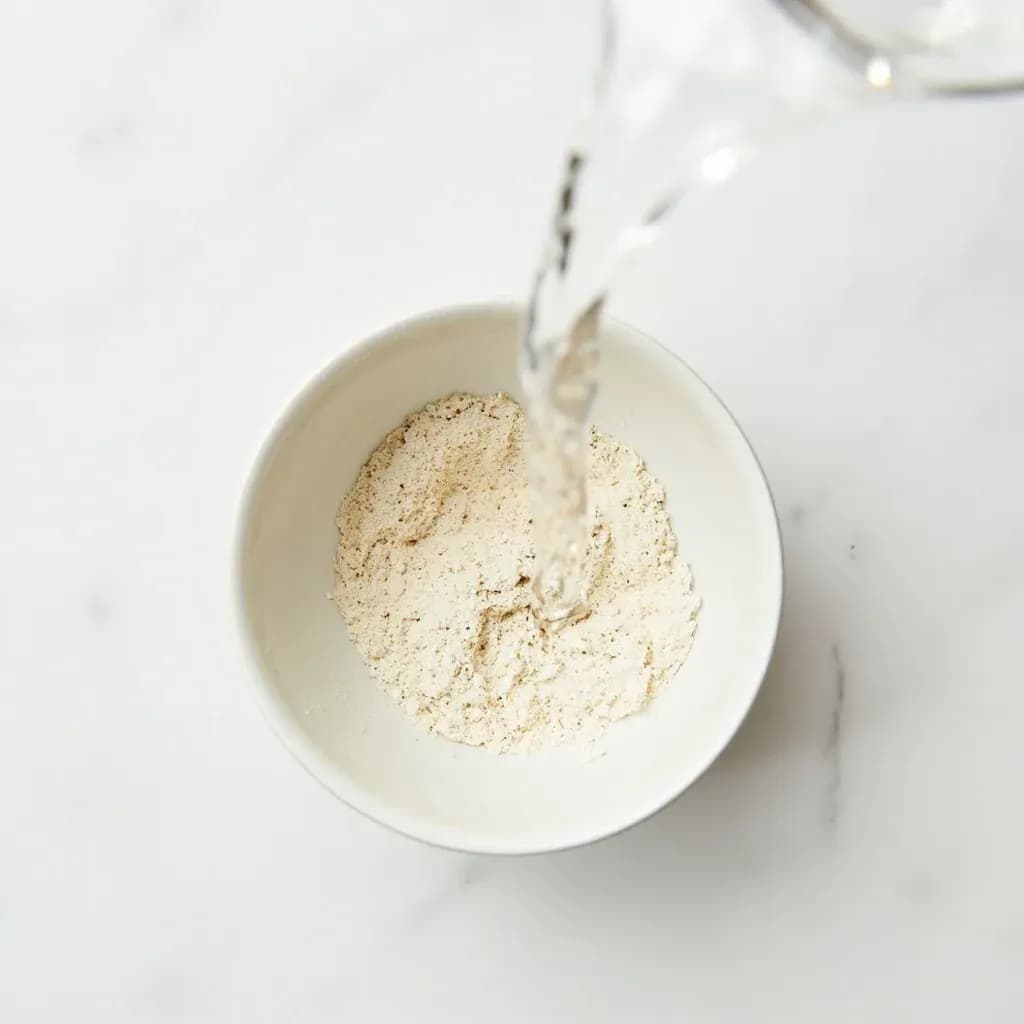
Gradually adding water to flour or dry mixes to reach the right consistency.
Hydration mixing is the controlled addition of water to flour, masa, or batters to bring dry ingredients together at the target moisture level. Adding liquid gradually lets the cook judge feel and avoid a too-wet or too-dry result, since absorption varies by flour and humidity. Proper hydration sets the stage for gluten development and even cooking.
Hydration is the act of bringing water (or another aqueous liquid) into flour so the proteins can organize and the starches can swell — and in baking it is the single biggest lever a cook has over dough behavior. Bakers measure it as a percentage: water weight divided by flour weight. A cracker sits around 35%, a baguette near 62%, and an open-crumb ciabatta can climb past 85%. Move that number by just 5 points and the same flour will produce a tighter or more open crumb, a stiffer or slack dough, and a noticeably different chew. This is why scaling bread formulas starts with the hydration ratio, not the volume of water.
Flour does not drink water instantly. When flour and water first meet, the mixture looks shaggy and the dough feels rough; over the next 20 to 60 minutes, starch granules fully swell and gluten strands begin aligning on their own. Resting the hydrated flour — the autolyse — is one of the most reliable shortcuts in bread making because it does much of the gluten development work for you. Whole-grain flours absorb 10 to 20% more water than all-purpose because their bran and germ soak up liquid, while cake and pastry flours absorb less because their protein content is lower and the resulting gluten network holds less water. Ambient humidity quietly shifts the same recipe too: expect to drop 1–3% of the water on a damp day and add it on a dry one.
Beyond bread, hydration governs batters (pancakes, tempura, crêpes), pasta, roux, soaked grains, and proofed yeast. Even liquids that are not pure water — milk, buttermilk, eggs, oil — interact with flour differently. Bakers typically count only the water fraction toward hydration because fats coat flour particles and sugars compete for liquid, both of which slow absorption. Understanding this single ratio, and the time it takes for water to actually do its work, is the foundation of confident dough work.
- Difficulty
- Easy
Types & varieties
All water added at once to flour; the simplest approach, used for quick breads and many yeasted doughs.
Mix only flour and water, rest 20–60 minutes before adding salt and yeast; improves extensibility and shortens kneading.
Equal weights of flour and water with a pinch of yeast, pre-fermented 8–16 hours at room temperature; loose, batter-like; classic in French breads.
An early-stage pre-ferment, similar to a poolish but often firmer, where yeast is bloomed in a portion of the flour-water mix.
A stiff pre-ferment at roughly 40–50% hydration, developed 12–16 hours; classic in Italian breads, adds nutty flavor and chew.
Mature starter refreshed with flour and water hours before mixing; wild yeast and bacteria provide leavening and complex flavor.
Cook 1 part flour with 3–5 parts water to ~65°C until a paste forms; gelatinizes starch for a softer, moister, longer-lasting crumb.
Pour boiling water over flour (typically 1:1), stir to a stiff paste, and rest; Japanese technique that pre-gelatinizes starch for enriched breads like shokupan.
Water added in small amounts while mixing by hand; common in pastry, biscuit, and scone work to keep hydration under tight control.
How to do it
- 1
Weigh and prepare ingredients
Weigh flour and water on a digital scale. If using active dry yeast, dissolve it in a small portion of the warm water with a pinch of sugar to proof; instant yeast can be added dry with the flour.
- 2
Combine flour and water
Place flour in a bowl. Add about 80–90% of the water all at once (or all of it for high-hydration doughs). Mix with a dough whisk, wooden spoon, or wet hand until no dry pockets remain — this is the shaggy stage.
- 3
Rest (autolyse)
Cover and let the dough rest 20–60 minutes. Flour fully absorbs the water and gluten begins to organize on its own, which shortens kneading and improves final texture.
- 4
Add salt and any reserved water
Sprinkle salt over the dough and pinch or fold it in along with any remaining water. Distribute evenly before bulk fermentation — salt regulates yeast and tightens gluten.
- 5
Develop the dough
Knead by machine (4–8 minutes with a dough hook) or by hand using stretch-and-folds (3–4 sets at 30-minute intervals). The dough should become smoother, more elastic, and only slightly tacky.
- 6
Check consistency
Stretch a small piece gently — well-developed dough forms a thin, translucent windowpane. For very high-hydration open-crumb breads, expect a slack, jiggly dough rather than a tight ball.
- 7
Adjust if needed
If stiff and tearing, mist or sprinkle a little water over the surface and fold it in. If too slack and sticky, dust with a small amount of flour. Make small adjustments — within 2–5% of the target hydration.
Reading hydration percentage
Hydration percentage is the most useful single number in a bread formula because it predicts how the dough will feel and what the crumb will look like before you ever touch it. A 50% dough — equal weights of water and flour — is firm, easy to shape, and produces a tight, even crumb suitable for sandwich loaves and rolls. A 65% dough begins to slacken and stick; shaping takes practice but the result is more open and chewy. Past 75%, the dough is genuinely difficult to handle, often requiring stretch-and-folds rather than kneading, wet hands rather than flouring the bench, and a long, cold ferment to develop structure. Lock the ratio first when scaling any recipe, then recalculate the water weight when flour changes — never the other way around.
- 35–45%: very stiff doughs — crackers, pretzel-style rolls, and stiff enriched doughs.
- 50–58%: standard sandwich loaves, dinner rolls, bagels, and most home bread.
- 60–65%: baguette, country loaf, focaccia territory.
- 70–80%: ciabatta, schiacciata, high-hydration pan loaves.
- 85%+: extremely slack, often handled as a wet slurry; needs serious gluten development and long fermentation.
Why liquids are not all the same
Not every liquid hydrates flour the same way. Whole milk, buttermilk, and eggs all contain water, but their fats and proteins coat flour particles and slow absorption, which is why enriched doughs feel stiffer at the same nominal hydration. Sugar is hygroscopic and competes for liquid, raising the effective hydration the dough actually needs. Oil does not hydrate at all — it shortens gluten strands, which is why a tablespoon or two of fat dramatically changes dough feel. When converting a water-dough formula to one that uses milk, juice, or a sweet liquid, adjust by feel and remember the water fraction is what truly hydrates the flour.
- Water: baseline — pure hydration at full strength.
- Milk: ~87% water; fats slow absorption, dough feels slightly stiffer.
- Buttermilk: ~88% water with acidity that softens gluten early.
- Eggs: ~75% water; proteins add structure beyond what flour provides.
- Oil: 0% hydration — coats flour and tenderizes rather than hydrates.
- Sugar and salt: dissolved into the water so they distribute evenly; salt should be added after the autolyse.
Common uses
Tips & pitfalls
- Weigh water and flour in grams; volume measures of flour can swing 20%+ per cup and throw off hydration.
- Reserve 5–10% of the water when mixing, then adjust by feel after a minute of absorption — you can always add water, but you cannot take it out.
- Use cool water for long, cold ferments; warm water for same-day doughs; never above 40°C/105°F if yeast is present, or you will kill the leavening.
- Filter or rest tap water overnight for sourdough and long ferments — chlorine and chloramine inhibit wild yeast and can stall a starter.
- After the initial mix, rest the dough 20–30 minutes (autolyse) before adding salt; this shortens kneading and improves the final crumb.
- Resist flouring the bench heavily with high-hydration doughs — use wet hands, oiled hands, or a bench scraper instead, or you will undo the openness the hydration was meant to create.
- Add salt after the autolyse, not during it; direct salt contact slows yeast activity and tightens gluten, which fights full hydration early on.
- Lock in the hydration ratio when scaling a recipe rather than the absolute volume of water — a 5% swing changes the crumb more than almost any other variable.
Good to know
- Definition
- Incorporating water (or another aqueous liquid) into flour or dry ingredients to form a dough, batter, or paste at a target consistency.
- Hydration ratio
- Baker's percentage: (water weight ÷ flour weight) × 100. Range runs from ~35% for crackers to 85%+ for open-crumb breads like ciabatta.
- Water temperature
- Cool 15–18°C (60–65°F) for cold ferments; warm 24–29°C (75–85°F) for active yeast. Above 40°C/105°F damages or kills yeast.
- Absorption time
- Flour fully hydrates over 20–60 minutes; an autolyse rest lets gluten begin organizing before salt or kneading enter the picture.
- Flour variance
- Whole-grain flours absorb 10–20% more water than all-purpose; high-protein bread flour absorbs slightly more than cake or pastry flour.
- Humidity effect
- On humid days, dough may need 1–3% less water; on dry days, slightly more. Flour stored open can lose or gain moisture too.
- Water quality
- Chlorine and chloramine in tap water can slow wild yeast. Filtered or rested (overnight, uncovered) water is preferred for sourdough and long ferments.
- Target dough feel
- Low hydration feels stiff, dry, and easy to handle. High hydration feels soft, slack, and sticky — and yields a more open, chewy crumb.
Also called
Water Mixing · Hydrating Flour
Related

Whisk
Beat ingredients smooth and aerated with a looping wire motion

Sift
Pass dry ingredients through mesh to aerate and remove lumps

Strain
Pour through mesh to separate solids from liquid for a smooth result

Filter
Pass liquid through fine material to clarify out the smallest particles

Rice
Press cooked potatoes through small holes for fluffy, lump-free texture

Mash
Crush soft cooked food into a rustic, creamy purée

Grind
Crush food into a coarse to fine texture, from spices to meat

Grate
Shred food into fine bits against a sharp-toothed surface