Transform & Preserve
Acid-Heat Coagulation
Curdling milk or soy milk with acid and heat to separate solid curds from whey.
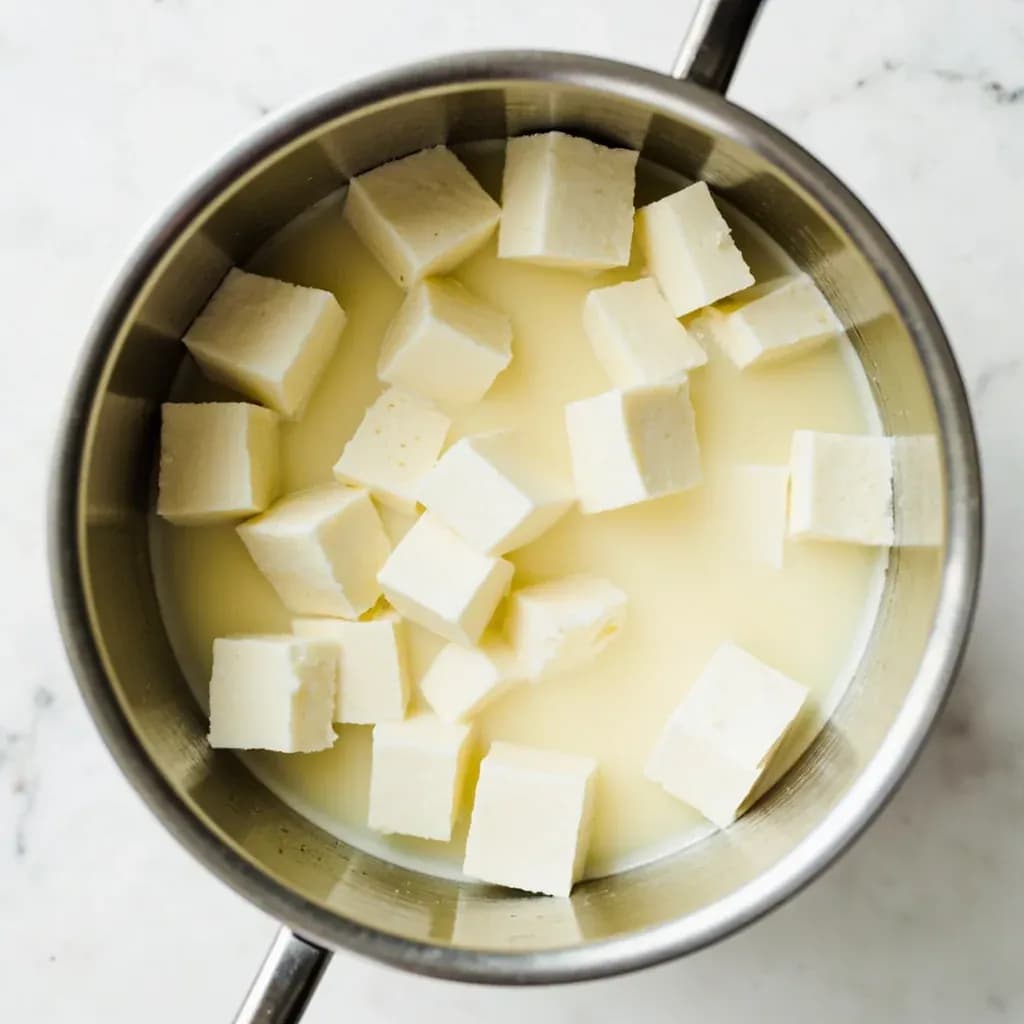
Acid-heat coagulation adds an acid such as lemon juice, vinegar, or citric acid to hot milk or soy milk, causing the proteins to denature and clump into curds that separate from the watery whey. It is the basis for fresh cheeses like paneer and ricotta and for tofu making. The temperature and acid amount control curd size and firmness, with gentler conditions giving softer, creamier results.
Acid-heat coagulation is the simplest path from liquid milk to solid curd, and every cook should know it. You warm milk, stir in an acid such as lemon juice or vinegar, and watch as the dissolved milk proteins — chiefly casein — suddenly clump together and float in a pool of pale, faintly green whey. What you are seeing is isoelectric precipitation: the acid has lowered the pH of the milk to roughly 4.6, the point at which casein molecules lose their electrical charge and can no longer repel one another. They collide, aggregate, and form a delicate network that traps fat and water. Heat accelerates the process and tightens the network, which is why scalding matters.
This is not the same as making yogurt or kefir, where live bacteria do the acidifying and little or no added heat is required. It is also distinct from rennet coagulation, where an enzyme clips the casein into a different kind of gel suitable for aged, sliceable cheeses. Acid-heat sits in between: faster than rennet, more controlled than pure culture work, and capable of producing a whole family of fresh, lactic-leaning cheeses — paneer, queso blanco, chhena, mascarpone, even a soft homemade tofu. The trade-off is shelf life. These cheeses are meant to be eaten within a week; their texture and flavor do not improve with age.
What makes the technique accessible is the forgiving equipment list and the speed. A heavy pot, a thermometer, a length of cheesecloth, and ten minutes of attention will yield a block of paneer or a bowl of ricotta-style curds that rivals anything from a specialty shop. The only real skill is reading the visual cues: a clean break when you draw a spoon through the pot, and whey that turns from milky-white to a clear, faintly yellow-green. Once you can spot those, you can adapt the method to nearly any dairy (or plant-milk) you have on hand.
- Difficulty
- Medium
Types & varieties
Indian fresh cheese; lemon juice or vinegar at ~90°C; pressed into a firm block, traditionally unsalted
Latin American fresh cheese; vinegar or lime juice added to scalded milk; sometimes rennet added for a firmer set
Similar to queso blanco but finished with a touch of salt and pressed lightly
Eastern European and American; curd salted and lightly pressed, often crumbled
Italian; cream (not milk) gently heated with lemon juice or cream of tartar; no straining needed
Indian fresh curd used as the base for sandesh and rasgulla; lemon juice or citric acid at ~85°C, drained lightly
Cypriot fresh whey-cheese variant made by reheating the whey from a prior acid-heat batch with extra acid
Homemade tofu style; soy milk boiled with nigari, citric acid, or lemon juice yields a soft, sweet curd
Reheating the leftover whey from an acid-heat batch produces a finer, lighter curd sold as ricotta-style
How to do it
- 1
Heat the milk
Pour milk into a heavy-bottomed stainless steel pot and warm slowly over medium heat, stirring occasionally to prevent scorching, until it reaches 80–95°C (175–205°F). Use a thermometer — accurate temperature is the difference between a tender curd and a rubbery one. Whole cow's milk is the easiest to work with; goat and sheep's milks will set but with a tangier, more pronounced flavor.
- 2
Add the acid
Turn off or reduce the heat. Add the chosen acid in small increments — about 1 tablespoon at a time per liter of milk — stirring very gently with a wooden spoon or spatula. Lemon juice and white vinegar are the most accessible; diluted citric acid powder gives a cleaner flavor. Stop stirring once you see the milk visibly curdle; further movement breaks the soft curds into fines that cloud the whey.
- 3
Let the curds set
Hold the pot off the heat for 2–5 minutes. The curds should rise into soft pillows, and the whey beneath should turn a clear, slightly green-yellow. If the whey remains milky after 5 minutes, return the pot to gentle heat and add another small splash of acid.
- 4
Strain the curds
Line a colander with butter muslin or a couple of layers of fine cheesecloth and set it over a bowl to catch the whey. Ladle the curds gently into the cloth, or pour the entire pot through a fine-mesh skimmer. Reserve the whey — it is full of protein, lactose, and calcium, and will find a use in bread dough, soup, or stock.
- 5
Rinse (optional)
For milder, less tangy cheese, rinse the curds under cool running water or dunk the cloth-wrapped bundle in a bowl of cool water. Skip the rinse for queso blanco-style cheeses where a slight tang is part of the character. Rinsing also halts the cooking, which helps if the curds have been sitting in hot whey.
- 6
Drain and press
Gather the cloth corners and tie. Hang the bundle for 15–30 minutes for a soft, spreadable cheese. For a firm, sliceable paneer, place the bundle on a plate, set another plate on top, and weight it with 1–4 kg of pressure (a few cans work) for 15–45 minutes. Longer pressing yields a drier cheese closer to farmer cheese or queso fresco.
- 7
Store
Unwrap and refrigerate in a covered container. For paneer, submerge in fresh cold water and change the water daily; for crumbly fresh cheeses, wrap in clean cloth. Use within 5–7 days. Acid-heat cheeses do not age — flavor and texture will only decline.
The Chemistry in the Pot
Casein is the workhorse protein of milk, and it spends its working life suspended in tiny molecular clumps called casein micelles. Each micelle carries a slight negative charge, and like charges repel — so the micelles float politely past one another and the milk stays liquid. Drop the pH toward 4.6, the casein isoelectric point, and that charge disappears. The micelles collide, fuse, and form a continuous protein network that traps the milk's fat and water. This is the curd. The thin liquid left behind is whey — mostly water, with dissolved lactose, a little residual protein, and most of the milk's minerals.
Heat plays a supporting but crucial role. At room temperature, the same amount of acid will eventually curdle the milk, but slowly and with a soft, fragile set. Heating to 80–95°C denatures the whey proteins (the secondary proteins in milk, which are not part of the curd network) and causes them to bind up with the casein, tightening the gel and squeezing out more whey. The result is a firmer curd that holds its shape when drained and pressed. Push past about 100°C, however, and the curd tightens too aggressively, becoming rubbery and dry.
Reading the Signs
Two visual cues tell you whether the coagulation is complete. Both are worth learning because they let you adjust on the fly without a pH meter.
- A clean break: draw the back of a spoon or a wooden spatula through the curds. The curds should part cleanly, leaving a clear trail of whey behind. If the milk closes back up and the liquid is still milky, you need more acid or more heat.
- Clear, green-yellow whey: well-set curds sit in whey that has turned from opaque white to a clear, faintly green or yellow color, sometimes described as resembling weak tea. Cloudy whey means the pH hasn't dropped far enough or the temperature was too low.
- Soft pillow texture: properly set curds float as discrete, pillowy masses that feel tender when nudged with a spoon. If they look like fine sand or cottage cheese pellets, you have over-coagulated or stirred too aggressively.
Acid-Heat vs. the Alternatives
Three routes lead from milk to curd, and it helps to know which is which when you read a recipe.
- Acid-heat (this technique): added acid, applied heat. Fast — under 30 minutes. Produces fresh, lactic cheeses that do not age. Examples: paneer, queso blanco, mascarpone, chhena.
- Rennet coagulation: no added acid, gentle heat (around 32–40°C), an enzyme (rennet, microbial coagulant, or vegetable rennet) does the work. Slower set, longer process, but the curd is elastic and suitable for stretching, aging, and hard cheeses like cheddar, gouda, and mozzarella.
- Pure acid / culture coagulation: bacteria (yogurt cultures, kefir grains, buttermilk) convert lactose to lactic acid. No added heat beyond warming the milk for the cultures. Examples: yogurt, labneh, cream cheese, cultured butter. The curds are softer and tangier than acid-heat cheeses.
Adapting to Plant Milks
The same principle works with non-dairy milks, though the results differ. Soy milk is the closest analogue to dairy because it is rich in protein and sets reliably with nigari (magnesium chloride), calcium sulfate, or citric acid combined with heat. The curds are softer and sweeter than dairy paneer, and a gentle press is usually enough. Almond and cashew milks have far less protein, so they produce a delicate, almost cream-like curd best suited to dessert applications — a base for vegan cheesecakes, a filling for crepes, or a thickener for sweet sauces. Keep the temperature lower (70–75°C) with nut milks to avoid scorching, and add the acid a little at a time so the delicate curds do not break up.
Common uses
Tips & pitfalls
- Heat the milk to the target temperature before adding acid. Pouring acid into cold or tepid milk produces a thin, mushy curd with low yield.
- Add acid gradually and stop stirring once curds begin to form. Over-agitation shatters curds into fines and clouds the whey, lowering yield and giving a grainy texture.
- If curds do not form, raise the heat by 5°C and add a second small splash of acid. Milk pH varies with freshness, fat content, and the cow's diet, so do not trust a recipe's acid dose blindly.
- Rinse curds briefly in cool water after draining to stop the cooking and wash away residual acidity that can make the cheese taste chalky, especially with lemon juice.
- Use full-fat pasteurized milk when possible. UHT milk can give a softer, less cohesive set because ultra-high-temperature processing alters the protein structure.
- Avoid aluminum or reactive metal pots. Use stainless steel or enameled cast iron to prevent metallic off-flavors leaching into the curds.
- Reserve the whey. It contains residual protein, lactose, and calcium, and is excellent in bread doughs, soups, stocks, and even a second pass at ricotta-style curds.
- Do not overshoot 100°C. Above a full boil the curd can seize into rubbery, dry clusters rather than tender pillows, and the flavor turns cooked and flat.
Good to know
- Primary mechanism
- Acid lowers pH to the isoelectric point of casein (~4.6), precipitating milk proteins while heat accelerates and firms the curd
- Typical acid agents
- Lemon juice, white vinegar, apple cider vinegar, lime juice, citric acid, lactic acid, cream of tartar, sour whey
- Target temperature
- 80–95°C (175–205°F) for most fresh cheeses; soy milk variants use 70–90°C
- Acid dose (approximate)
- 15–30 ml of vinegar or 30–60 ml of lemon juice per liter of milk
- Yield
- Roughly 200–250 g of curd per liter of whole milk (~1–1.5 lb per gallon)
- Byproduct
- Sweet or acidified whey (80–90% of original milk volume)
- Time to set
- 2–5 minutes after acid is added once at temperature
- Difficulty
- Beginner-friendly; minimal equipment
- Milk fat considerations
- Whole milk gives the richest texture; skim yields a drier, more rubbery curd
Also called
Acid Coagulation · Acid-Set Curdling
Dishes that rely on it
Related

Confit
Cook slowly submerged in fat for silky tenderness and keeping

Cure
Draw out moisture with salt and time to preserve and concentrate

Pickle
Steep in acidic brine for bright, tangy, crunchy preservation

Ferment
Let friendly microbes transform food into tangy, complex flavor

Marinate
Soak in a seasoned mix to flavor and tenderize before cooking

Brine
Soak in salt water so meat stays juicy and seasoned throughout

Dehydrate
Slowly dry out moisture to concentrate flavor and extend shelf life

Cold-Smoke
Perfume cured food with smoke without cooking it through