Knife Skills
Scaling and Gutting Fish
Removing a fish's scales and viscera to ready it for cooking.
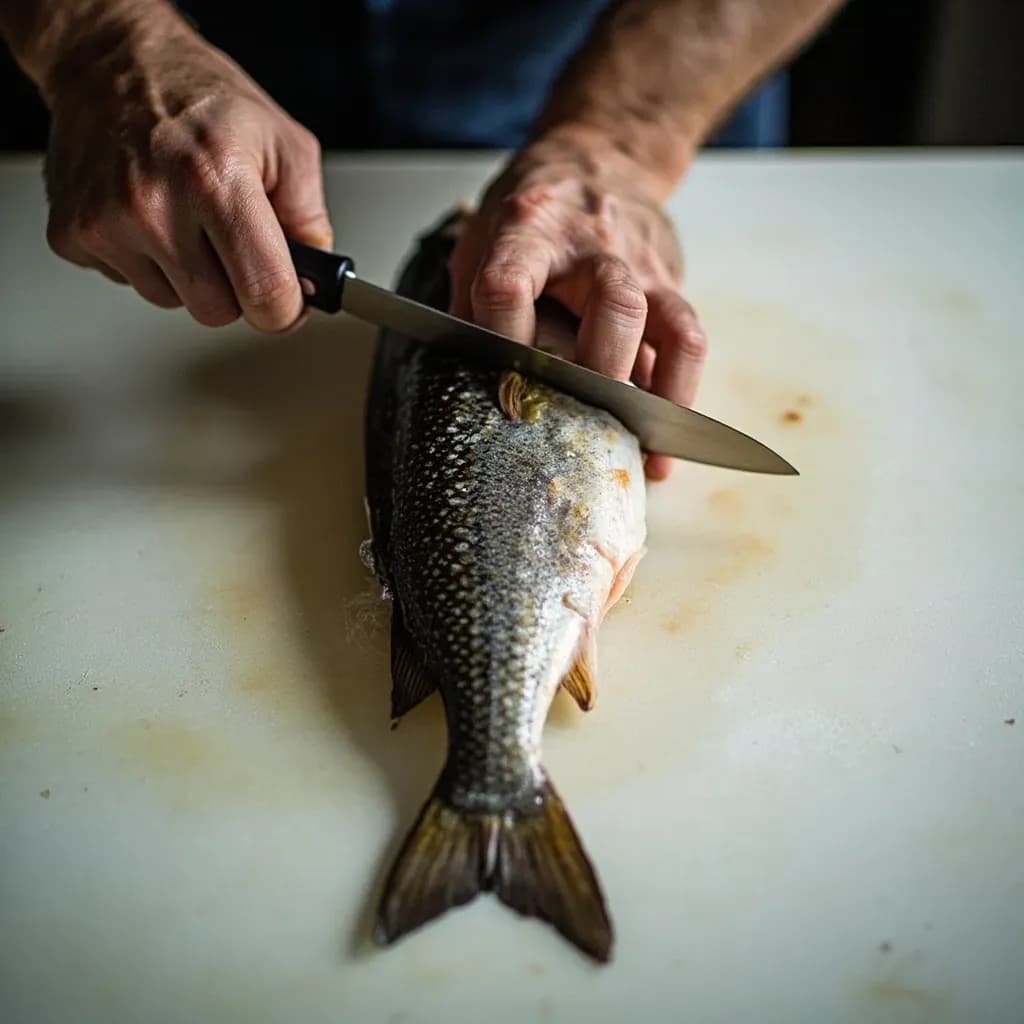
Scaling and gutting fish prepares a whole fish by scraping off the scales against the grain with a knife or scaler, then slitting the belly to remove the guts and gills. Working under running water keeps scales and debris from scattering, and a clean cavity prevents bitterness and spoilage. It is the basic first step before filleting, stuffing, or cooking a fish whole.
Scaling and gutting is the first and most fundamental act of fish cookery — the gateway step that turns a whole, slime-coated fish into a clean canvas for grilling, roasting, poaching, or breaking down further into fillets and steaks. Get it right and the fish stays intact, presents beautifully, and cooks evenly; get it wrong and a punctured gallbladder floods the flesh with bitter bile, a missed bloodline carries a muddy taste into the pan, or leftover scales fuse to the skin during searing.
The technique is less about speed than about three habits that, once learned, transfer across nearly every species. First, scales come off against the grain, from tail toward head, on a wet surface to keep them from scattering. Second, the belly incision is shallow — the blade skims along the underside, never plunging into the cavity where the gallbladder sits. Third, the cavity is rinsed until the water runs clear and the dark kidney tissue along the spine is scraped away, especially on lean white fish. Master these three and salmon, trout, snapper, sea bass, mackerel, and most round fish become routine work.
Beyond cleaning, scaling and gutting is also the point at which a cook decides what to save: roe and milt for separate cures, livers (cod, monkfish) for spreads, cheeks and collars for a quick pan-sear, and every bone and head for stock. A whole fish that has been handled with care yields almost nothing to the trash bin.
- Difficulty
- Medium
Types & varieties
Standard method — salmon, trout, mackerel, snapper, sea bass, perch, carp. Scale against the grain, gut through a belly incision, remove the gills.
Sole, flounder, halibut, turbot. Scale only the eyed (upper) side; the blind side is usually scaleless or nearly so. Gut through a short crescent incision along the belly.
Sardines, anchovies, smelts, herring. Often gutted through the gills by twisting and pulling, leaving the belly intact to preserve fat.
Catfish, eel, skate, shark, monkfish. Skip scaling — skin is removed separately or cooked on. Eel is cut behind the pectoral fin; catfish is skinned with pliers after a nick.
Tuna, large salmon, large snapper. Bleed immediately by cutting the throat or tail, gut promptly, then remove the kidney along the spine and rinse thoroughly.
Not scaling/gutting proper, but the same knife-skill workflow — deveining shrimp, cleaning squid tubes, debearding mussels — belongs in the same category.
How to do it
- 1
Set up the station
Lay a damp towel or wet newspaper on the cutting board to keep the fish from sliding. Position the sink half-full of cold water, or have a lined tray ready. Gather a scaler or the back of a chef's knife, a flexible boning or fillet knife, kitchen shears, and a bowl of cold water for scraps.
- 2
Rinse and inspect
Rinse the fish under cold running water and pat the skin damp. Locate the vent just ahead of the anal fin, the gill covers on each side, and the pectoral fins. For flatfish, identify the eyed (upper) side — that is the only side that needs scaling.
- 3
Scale the fish
Hold the fish firmly by the tail, using a cloth or salt-dipped hand for grip. Drag the scaler or the dull back edge of a chef's knife firmly from tail toward head, working in short overlapping strokes. Cover the entire body, including around the fins and behind the gill cover. Flip and repeat, then rinse off loose scales under cold water.
- 4
Make the belly incision
Lay the fish belly-up. Insert the tip of a sharp knife just in front of the vent, angling the blade shallowly. Cut a straight line forward along the belly to the base of the pectoral fin, or up to the lower jaw for larger fish. Keep the cut shallow to avoid puncturing the gallbladder or any organs beneath.
- 5
Remove the viscera
Reach in with fingers or the handle of a spoon and pull the entrails out in one motion if possible. For roe or milt, work gently so the sacs stay intact. Grip the gills at the throat and twist them outward to remove. Trim any remaining membrane with the tip of the knife.
- 6
Scrape the bloodline and kidney
On firm-fleshed fish, run the back of a spoon or the edge of a knife along the spine inside the cavity to lift the dark kidney tissue and any coagulated blood. This matters most for cod, halibut, snapper, and other lean white fish; skip it for oily fish where that flavor is welcome.
- 7
Rinse and dry the cavity
Hold the fish under cold running water and let it flush through the cavity from head to tail. Repeat until the water runs clear and no traces of blood, scales, or membrane remain. Shake out excess water and pat the inside and skin dry with paper towels.
- 8
Final check and chill
Run a finger along the skin to feel for any remaining scales — missed patches will mar a pan-seared or grilled presentation. Place the cleaned fish on a chilled plate, loosely cover, and refrigerate. Use within 24–36 hours for best quality, or wrap tightly and freeze.
The Three Habits That Make It Stick
Most beginners struggle with scaling and gutting not because the steps are hard but because they skip the small disciplines that contain mess and protect flavor. Internalize these and the rest becomes muscle memory.
- Wet everything before scaling. Dry scales snap off the skin and ricochet across the kitchen; a damp fish on a damp surface keeps them where you can rinse them down the sink.
- Keep the belly incision shallow. The blade should skim the underside like a letter opener, never plunge. A punctured gallbladder is the single most common mistake — it stains the flesh green and the bitterness penetrates surprisingly far.
- Rinse until the water runs clear, then dry. Blood, loose scales, and membrane left in the cavity will cloud a poaching liquid, scorch on a grill, and carry a faintly metallic taste. Pat the cavity and skin dry with paper towels before cooking.
What to Save From the Carcass
A properly broken-down fish yields far more than two fillets. Treating the trim as ingredients rather than waste changes how a cook values a whole fish.
- Heads, bones, tails, and skin trimmings go straight into the freezer for fish stock — they often have more flavor than the fillets themselves.
- Roe sacs and milt are worked out gently and kept whole for frying, bottarga-style curing, or pasta with bottarga.
- Livers of cod and monkfish are prized in their own right; remove carefully and reserve separately.
- Cheeks, collars, and belly flaps are reserved for a separate pan-sear — these cuts are rich and often the best bites on the fish.
Common uses
Tips & pitfalls
- Wet the fish and the scaler before starting — dry scales snap off and fly across the kitchen.
- Scale into a sink with a few inches of water, or onto wetted newspaper that can be folded and discarded.
- Always cut shallowly through the belly wall; a deep nick ruptures the gallbladder and spreads bitter bile across the flesh.
- For firm white fish (cod, halibut, snapper), scrape out the dark kidney tissue running along the spine — it carries a strong, off-putting flavor if left behind.
- Pull the gills on larger fish; they harbor blood and bacteria and contribute a muddy taste if left in.
- Dip fingers in coarse salt to grip slippery skin, especially with eel, mackerel, and fresh-caught fish.
- If a gallbladder ruptures, trim the greenish-stained flesh generously and rinse — the bitterness penetrates farther than it looks.
- Keep cleaned fish on ice and return it to the refrigerator immediately if there is any delay before cooking.
Good to know
- Category
- Knife Skills / Fish Butchery
- Difficulty
- Beginner to intermediate; improves markedly with practice
- Typical time
- 5–10 minutes per small to medium fish; 10–20 minutes for larger specimens such as whole salmon or snapper
- Essential tools
- Sharp flexible boning or fillet knife (6–8 in / 15–20 cm), scaler or back of a chef's knife, sturdy cutting board, kitchen shears, cold running water
- Direction of scaling
- Against the grain — from tail toward head
- Incision line
- From vent forward to the base of the pectoral fin or lower jaw, kept shallow to protect the gallbladder
- Yield consideration
- Roughly 60–75% edible yield from a whole round fish after scaling and gutting, depending on species and head-on/off prep
- Storage note
- Cleaned fish keeps 1–2 days refrigerated on ice; freeze promptly if not used the same day
Also called
Scaling and Gutting Fish · Cleaning Fish · Dressing Fish
Related

Chop
Cut into rough, irregular pieces — the everyday workhorse cut

Dice
Cut into uniform cubes for even cooking and a tidy look

Mince
Cut as fine as possible so flavor melts evenly into the dish

Slice
Cut into even, flat pieces for consistent cooking and presentation

Julienne
Cut into thin matchsticks for fast cooking and elegant garnish

Brunoise
Cut into tiny, precise cubes — the finest dice in the kitchen

Chiffonade
Roll and slice leafy greens into delicate ribbons

Batonnet
Cut into tidy sticks, thicker than julienne — think classic fries