Heat & Fire
Pan-Frying
Cooking food in a moderate layer of fat in a skillet for a crisp, browned crust.
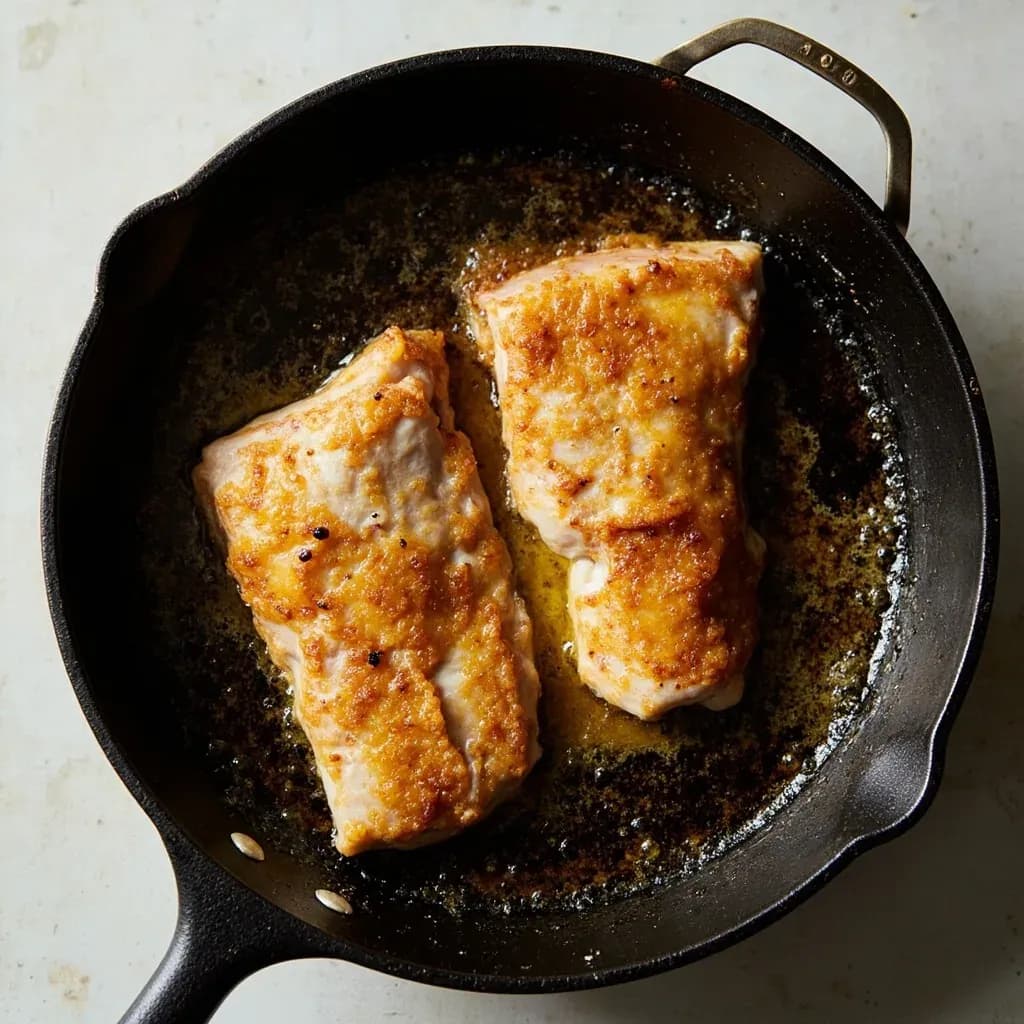
Pan-frying cooks food in a shallow layer of fat in a skillet over medium-high heat, browning one side then the other. It suits cutlets, fish fillets, and crisped items like rösti where you want a golden crust without full immersion. Letting the pan and fat get properly hot before adding food prevents sticking and ensures even browning.
Pan-frying is the workhorse method that sits in the wide, useful middle between a slick sauté and a full submersion deep-fry. You heat a moderate layer of fat—roughly an eighth to a quarter inch, enough to come partway up the food in shallow-frying versions—in a heavy skillet over medium to medium-high heat, then lay the food flat so it makes full contact with the metal. The technique is defined less by the pan you use than by what happens in it: surface moisture is driven off quickly, the Maillard reaction kicks in, and a thin, deeply flavored crust forms within a few minutes per side.
That crust is the whole point. Pan-frying is the technique you reach for when you want color and texture—a chicken cutlet with a burnished exterior, a salmon fillet with skin that snaps when you bite it, a schnitzel with a shatter of golden crumbs—without committing to a pot of hot oil. It works because the food touches the pan directly, the fat conducts heat efficiently, and the shallow depth of oil buffers the surface against the temperature swings that would otherwise scorch the food. Breaded and battered items benefit most, but even a bare steak or a mushroom cap will develop complex flavor under the right conditions.
Where pan-frying proves its real worth, though, is in what it leaves behind. The browned bits—the fond—that cling to the pan are pure flavor, ready to be lifted with a splash of wine, stock, or citrus and turned into a built-in sauce. The method is also forgiving in a way deep-frying is not: a single small skillet, a quarter-cup of oil, and an instant-read thermometer are enough to handle everything from pancakes to pork chops. The skill is not in the equipment but in three habits—a preheated pan, dry food, and the patience to let a crust form before you touch it.
- Difficulty
- Easy
Types & varieties
Slightly more oil, often enough to come halfway up the food; used for battered or breaded items like schnitzel and fritters.
Cooked in a well-seasoned or nonstick pan with little or no added fat; closer to a hard sear than a true fry.
High-heat cousin using minimal fat; produces a deep crust on steaks, scallops, and duck breast. Often grouped with pan-frying in casual usage.
Strictly uses a thin film of fat and frequent tossing over higher heat; many modern recipes use 'pan-fry' and 'sauté' interchangeably, though classic technique texts distinguish them.
Dry, fat-free cooking on a flat metal surface; included here as the no-fat limit of the pan-frying family.
How to do it
- 1
Choose the pan and fat
Use a heavy-bottomed 10–12 inch skillet (cast iron, carbon steel, or clad stainless for most tasks; nonstick for eggs and delicate fish). Pick a fat whose smoke point exceeds your target temperature: clarified butter, ghee, or a neutral oil like canola or grapeseed for 350°F and up; butter or extra-virgin olive oil for gentler work near 325°F.
- 2
Preheat the pan
Set the skillet over medium to medium-high heat for 1–2 minutes before adding fat. A heavy pan needs this time to come up to even temperature; rushing this step is the most common cause of sticking and uneven browning.
- 3
Add fat and check the heat
Pour in enough oil to coat the bottom by about 1/8 inch (roughly 2–3 tablespoons in a 10-inch pan). When the oil shimmers, thins out, and just begins to ripple, it is ready. A small drop of water should sizzle on contact and skitter across the surface.
- 4
Prep and dry the food
Pat the food thoroughly dry with paper towels—especially important for proteins, mushrooms, and eggplant. Season generously with salt and pepper on both sides just before it goes into the pan. If breading, dredge in seasoned flour, egg wash, and crumbs and let the coating set for a minute so it adheres.
- 5
Lay the food in the pan
Place each piece away from you and gently to avoid splashing. Maintain at least 1/2 inch between pieces; if the pan feels crowded, cook in batches. Cold pieces dropped into a hot pan should audibly sizzle—if they do not, the pan is too cool.
- 6
Cook undisturbed on the first side
Leave the food alone while a crust forms. Peek only after 2–3 minutes by lifting an edge with a thin spatula. A properly browned cutlet or fillet releases on its own; if it sticks, give it another 30–60 seconds.
- 7
Flip and finish the second side
Turn the food once with a spatula or tongs. For thicker items (chops, patties, thick chicken breasts), reduce the heat to medium after flipping to let the center cook through without burning the crust. For breaded items, watch for the deep golden color that signals the coating is set.
- 8
Check doneness
Use an instant-read thermometer for proteins: 145°F (63°C) for pork, 125–130°F (52–55°C) for medium-rare steak, 165°F (74°C) for poultry, 145°F (63°C) for fish (or until the flesh flakes). Breading should be deep golden and crisp, not pale. Pull most proteins 5°F short of the final target; carryover heat will finish them.
- 9
Rest before serving
Transfer to a wire rack (or a plate lined with paper towels for very fatty items) for 3–5 minutes. Resting lets juices redistribute and—critically—keeps the crust crisp by letting steam escape rather than condense back onto the food.
- 10
Use the pan for sauce (optional)
Pour off all but a tablespoon of fat, return the pan to medium heat, and deglaze with a splash of wine, stock, or citrus. Scrape the fond with a wooden spoon, reduce briefly, and finish with a knob of butter or herbs for a built-in sauce.
Choosing the right fat
The fat you choose is a working compromise between smoke point and flavor. Refined neutral oils (canola, grapeseed, sunflower, peanut) handle the highest temperatures and let the food's own flavor lead. Clarified butter and ghee give you much of butter's flavor without the milk solids that burn at lower temps. Whole butter and extra-virgin olive oil are reserved for gentler work—eggs, delicate fish, latkes—where you want flavor and the temperature stays near 325°F. Rendered animal fats (lard, bacon, schmaltz) bring their own savory notes and stand up to medium-high heat; they are the traditional choice for schnitzel, hash, and fried potatoes.
- 400°F and up (hard sear, deep crust): grapeseed, refined peanut, avocado oil
- 350–375°F (cutlets, schnitzel, fritters): clarified butter, ghee, canola, sunflower
- 325°F (eggs, fish, pancakes): whole butter, light olive oil
- 300°F and below (gentle finish): extra-virgin olive oil, browned butter worked off the heat
- For flavor: rendered bacon fat, schmaltz, or duck fat when the dish suits
Reading the crust
The first sixty seconds of contact tell you almost everything you need to know. A proper sear sounds like a steady, focused sizzle—not silence (the pan was too cool) and not a violent roar (the pan is too hot or the food too wet). Within two to three minutes the edges of the food will begin to turn opaque and rise slightly from the pan as water in the food evaporates. The color of the underside, when you finally peek, should be an even deep gold to mahogany. And the most reliable signal of all: a properly browned piece releases on its own when you nudge it with a spatula. If it sticks, the crust has not formed yet—give it another thirty to sixty seconds.
- Listen for a steady sizzle, not silence or a roar
- Look for opaque, slightly lifted edges as the crust begins to form
- Peek at the underside after 2–3 minutes; aim for an even deep gold to mahogany
- Nudge gently with a spatula; the food should release on its own
- If it sticks, wait 30–60 seconds—the crust is still building
Common uses
Tips & pitfalls
- Preheat the empty pan over medium heat for 1–2 minutes before adding fat—a cold pan is the most common cause of pale, greasy food.
- Pat protein and vegetables thoroughly dry with paper towels; surface moisture steams the food and prevents browning.
- Don't overcrowd. Leave at least 1/2 inch between pieces and work in batches; crowded pans drop in temperature and steam the food.
- Match the fat to the temperature: clarified butter, ghee, and light refined oils for 350°F and up; butter and extra-virgin olive oil for gentler heats near 325°F.
- Season the food, not the oil. Salt dropped into hot fat burns, smokes, and breaks down quickly.
- Resist the urge to flip or move the food. A proper crust needs uninterrupted contact with the hot surface—usually 3–4 minutes per side for a thin cutlet.
- Rest finished food on a wire rack, not a plate. A plate traps steam and softens the crust you worked to build.
- Save the fond. After removing the food, deglaze the same pan with wine, stock, or citrus for an instant pan sauce.
Good to know
- Method family
- Dry-heat cooking with added fat
- Fat depth in pan
- Roughly 1/8 to 1/4 inch (3–6 mm); up to about 1/3 of the way up the food in shallow-frying variants
- Target oil temperature
- 325–375°F (165–190°C) for most work; up to 400°F (205°C) for thin, quick-seared items
- Pan materials
- Cast iron, carbon steel, stainless steel, and clad stainless; nonstick for delicate items like eggs and fish
- Key chemistry
- Surface dehydration and the Maillard reaction drive browning; starch coatings (flour, breading) accelerate it
- Distinguishing feature
- Sits between sautéing (less fat, more tossing, higher heat) and deep-frying (food fully submerged)
- Doneness targets
- 145°F (63°C) for pork, 125–130°F (52–55°C) for medium-rare steak, 165°F (74°C) for poultry, 145°F (63°C) for fish
- Difficulty
- Beginner to intermediate; success depends more on technique than on skill
Also called
Pan-Fry · Friggere in Padella
Dishes that rely on it
Related

Sear
Blast the surface hot for a deep-browned, savory crust

Sauté
Cook quickly in a little fat over lively heat, tossing as you go

Stir-Fry
Toss bite-sized pieces over roaring heat for fast, smoky cooking

Pan-Fry
Crisp food in a shallow layer of hot fat, turning once or twice

Deep-Fry
Submerge in hot oil for an all-over crackling crust

Roast
Cook uncovered in dry oven heat for browned edges and tender centers

Bake
Cook with steady, surrounding oven heat — the soul of bread and pastry

Broil
Hit food from directly above with fierce overhead heat